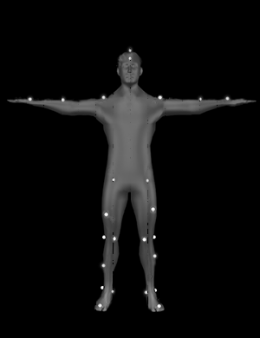
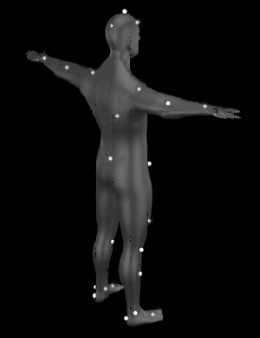
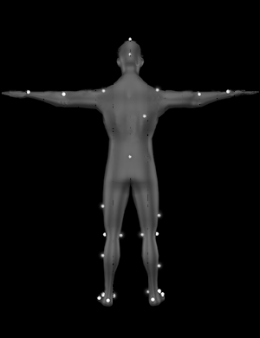
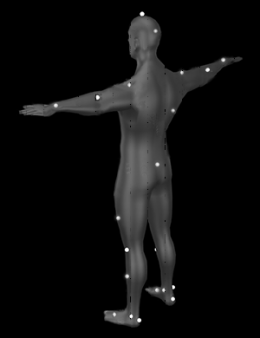
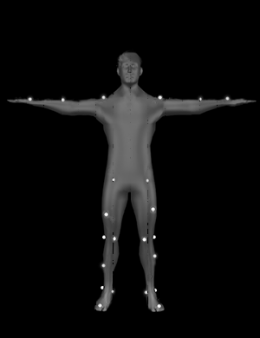
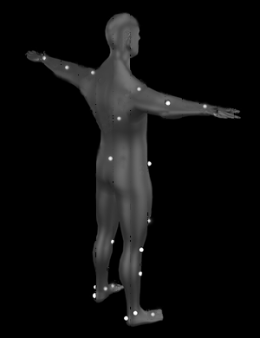
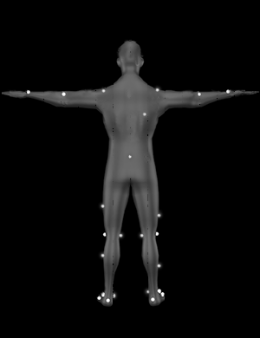
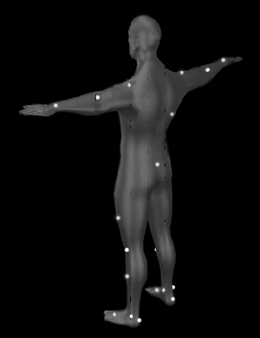
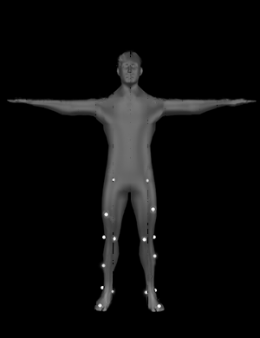
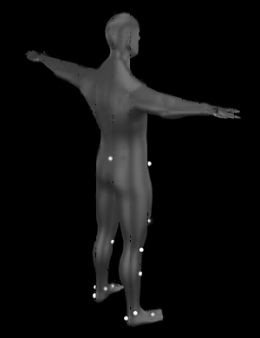
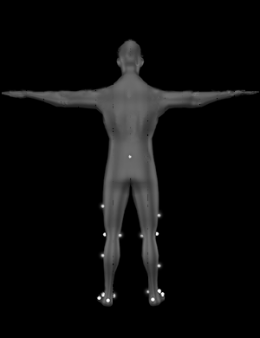
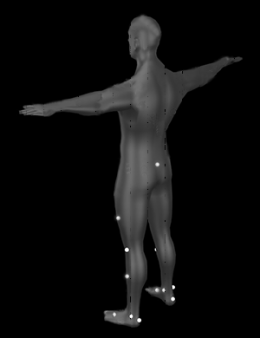
| Top | Top.Head | √ | | | At the center and top of the head |
| In front of the head Behind the head | | | | | |
| Behind the head | Front.Head Rear.Head | | | | |
| Rear.Head | √ | | | At the front and rear of the head | |
| Left shoulder Right shoulder | | | | | |
| Right shoulder | L.Shoulder R.Shoulder | | | | |
| R.Shoulder | √ | √ | | The tip of the shoulder crest protrusion | |
| Left elbow Right elbow | | | | | |
| Right elbow | L.Elbow R.Elbow | | | | |
| R.Elbow | √ | √ | | Lateral Epicondyle | |
| Left wrist Right wrist | | | | | |
| Right wrist | L.Wrist R.Wrist | | | | |
| R.Wrist | √ | √ | | Between the radial styloid process and the ulnar styloid process | |
| Sacrum | R.Offset | √ | √ | | The upper surface at the sacral interface |
| Left front waist Right front waist | | | | | |
| Right front waist | L.ASIS R.ASIS | | | | |
| R.ASIS | √ | √ | √ | On the protruding skeleton on the left and right sides of the front of the pelvis | |
| Upper Left Thigh Upper Right Thigh | | | | | |
| Upper Right Thigh | L.Thigh R.Thigh | | | | |
| R.Thigh | √ | √ | √ | Middle thigh up 1cm | |
| Left Lateral Knee Right Lateral Knee | | | | | |
| Right Lateral Knee | L.Knee R.Knee | | | | |
| R.Knee | √ | √ | √ | Place the marker on the lateral protrusion of the knee joint axis | |
| Left medial knee Right medial knee | | | | | |
| Right medial knee | L.Knee.Medial R.Knee.Medial | | | | |
| R.Knee.Medial | √ | √ | √ | The medial protrusion of the knee joint axis | |
| Left lateral ankle joint Right lateral ankle joint | | | | | |
| Right lateral ankle joint | L.Ankle R.Ankle | | | | |
| R.Ankle | √ | √ | √ | On the side of the ankle axis, at the lateral protrusion of the inner ankle skeleton | |
| Left Medial Ankle Joint Right Medial Ankle Joint | | | | | |
| Right Medial Ankle Joint | L.Ankle.Medial R.Ankle.Medial | | | | |
| R.Ankle.Medial | √ | √ | √ | The medial side of the ankle axis; The medial protrusion of the inner malleolus | |
| Left toe Right toe | | | | | |
| Right toe | L.Toe R.Toe | | | | |
| R.Toe | √ | √ | √ | The center of the foot, between the second and third metatarsals | |
| Left Heel Right Heel | | | | | |
| Right Heel | L.Heel R.Heel | | | | |
| R.Heel | √ | √ | √ | Center of heel skeleton | |