(四)Unity插件
Plugin Import
- Unzip the plugin installation package "Nokov_Unity_Plugin_XXXX.unitypackage". Create a Unity project, click Assets (17.6.1), select Import Package--Custom Package..., and import the unzipped Unity plugin (17.6.2).
.png)
17.6.1
.png)
17.6.2
- When importing for the first time, if the console shows red compilation errors and warnings suggesting to enable unsafe code, follow these steps:Navigate to Edit → Project Settings → Player.Under the Other Settings section, check the box for Allow Unsafe Code (17.6.3).
.png)
17.6.3
Unity Setup and Usage
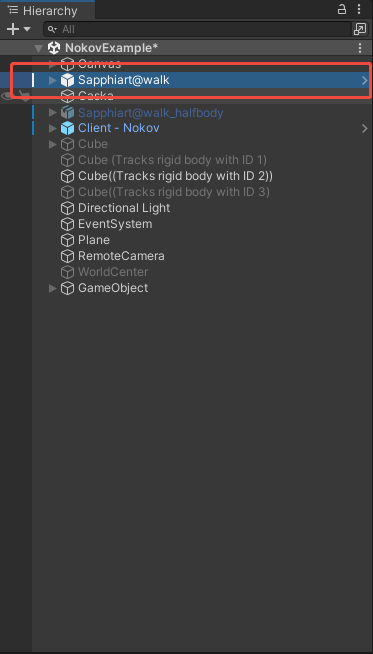
- Select "Assets—Nokov—Scenes—NokovExample" in the imported installation package and double-click to open it (17.6.4).
.png)
17.6.4
- Click on "Client - Nokov" in the Hierarchy panel. Modify the Host IP on the right to 10.1.1.198. Expand Bone Naming Convention (17.6.5, 17.6.6) to make a selection:For markerless human motion data, select the "MARKERLESS" option.For other types of human motion data, choose the corresponding option based on the body type.

17.6.5
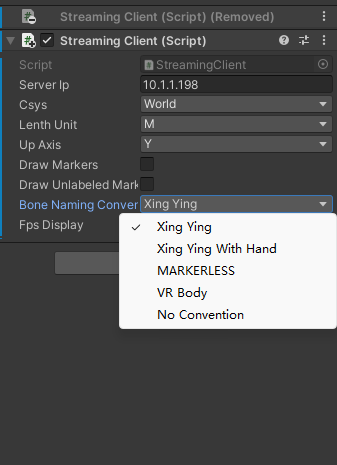
17.6.6
- Click on "Sapphiart@walk" in the Scene. Ensure the following in the Inspector:Three modules are checked.The "Skeleton Asset Name" in "Nokov Skeleton Animation (Script)" matches the character name in the software (17.6.7, 17.6.8).Press Enter to save changes after modification.
17.6.7
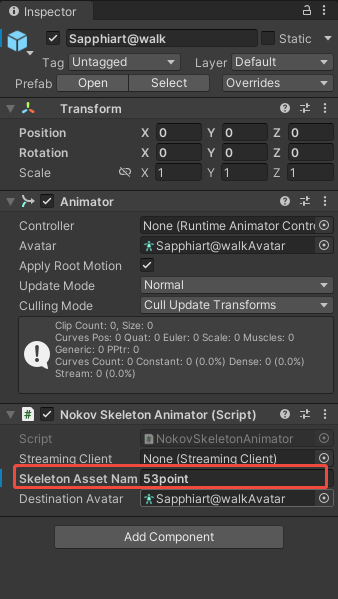
17.6.8
- Ensure that the Astra Professional software is in playback mode. Click the play button in Unity and make the human body in Astra Professional move. The model in Unity will then be driven to perform synchronized movements (17.6.9).
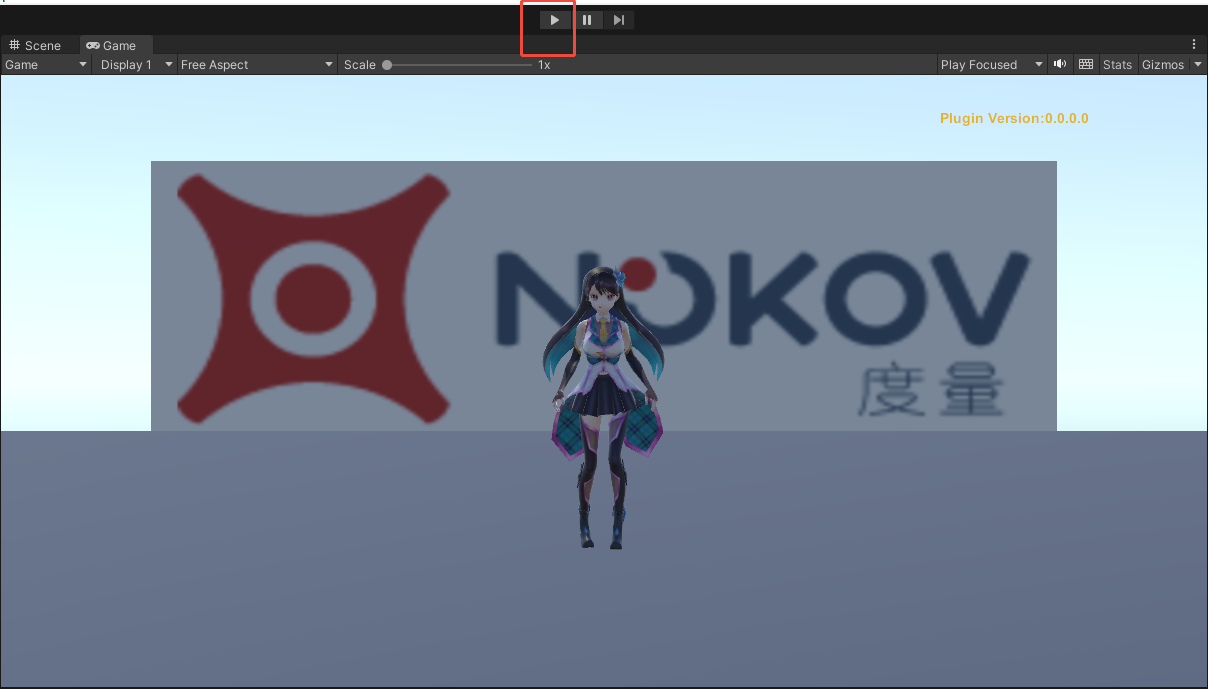
17.6.9
- You can switch to the Scene view to observe the model from different angles (17.6.10).
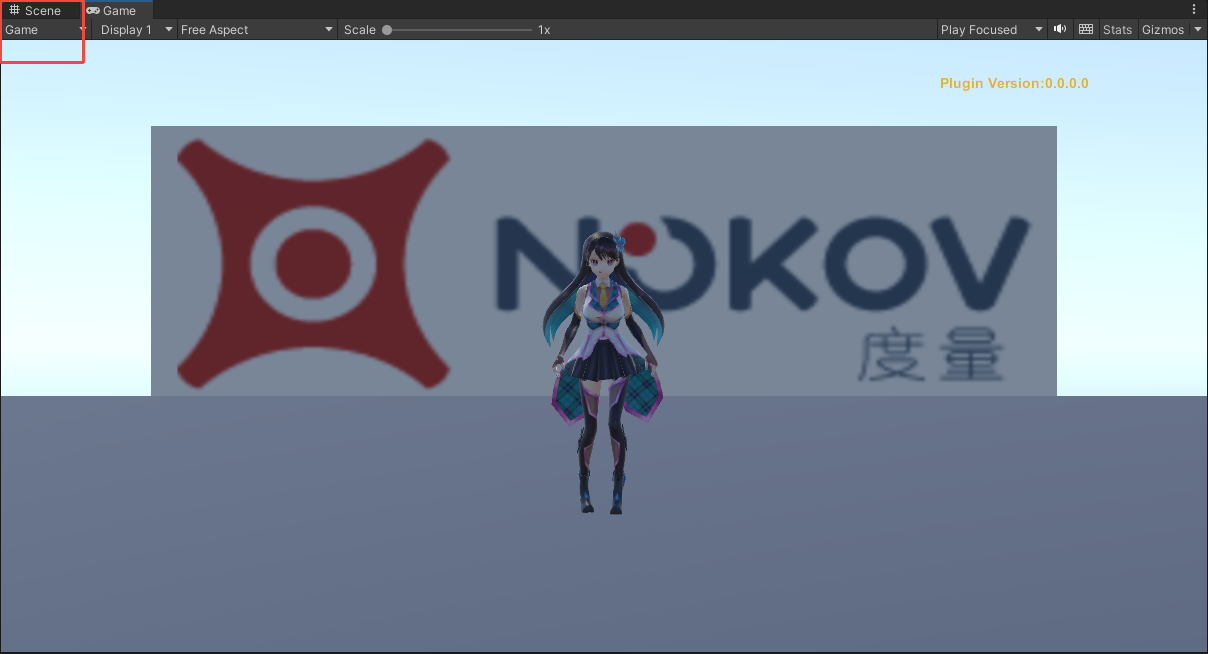
17.6.10
命名点与未命名点的显示
- 在Unity中点击"Client-Nokov",将Draw Unlabeled Markers复选框勾选上(17.6.11),点击Unity软件上方的"Play" 按钮,在Unity场景中便会显示出未命名点。
.png)
17.6.11
- 勾选"Draw Markers"复选框(17.6.12),点击"Play"按钮后,Unity场景上会显示出人体的命名点。
.png)
17.6.12
- 展开"Client-Nokov"后,列表中会显示命名点和未命名点的ID,在列表上选中命名点或未命名点的ID名称后,可以在Unity场景中查看命名点或未命名点的位置,在右侧会显示选中点的XYZ位置坐标(17.3.13)。
.png)
17.3.13
- 下拉框选择缩放比例、下拉框选择向上轴:点击"Client-Nokov",在右侧点击"Lenth Unit"展开下拉框选择缩放比例(17.6.14),可选择" meter、Centimeter、Millimeter"三个单位对Unity场景中的对象进行缩放,默认单位为"Meter";点击"Up Axis" 选项展开下拉框可选择Unity场景中的向上轴,可选择"Y、Z"两种轴向,默认向上轴为"Y";
.png)
17.6.14
VRPN手柄接入Unity
- 请先按照上文"十七、手柄连接说明与VRPN数据接入UE说明"中的说明对手柄进行连接和动捕进行设置;
- 将被捕捉物贴上反光标记点,在Astra professional软件实时模式下创建一个刚体。
- 打开Unity,新建一个工程。
- 将插件拖入"Assets"中(17.6.11),插件请联系我们的技术工程师获取。点击"Import"导入,导入后在"Assets--UVRPN--Sences" 目录中双击"Demo"进入Unity场景(17.6.12),切换到"Sence"(17.6.13);
.png)
17.6.11
.png)
17.6.12
.png)
17.6.13
- 参数设置:
- 设置本机地址:在"VRPN_Manager"中将"Host:(IP/localhost)"的地址设置为"127.0.0.1" (17.6.14),若连接的是其他主机,则将此处的IP地址改为其他主机的服务端IP地址,设置好IP后按下回车键并Ctrl+S保存;
.png)
17.6.14
- 开启日志:开启日志可详细看到手柄按键被按下的打印信息,打印错误日志后可有助于找到问题所在从而解决问题。选择" Window--General--Console",并将"Debug Log"勾选上(17.6.15);
.png)
17.6.15
- 设置Flystick:点击"Flystick",在"VRPN_Tracker(Script)"模块中的"Tracker"输入框输入VR Tracker软件创建的刚体名称,"Channel" 设置为0并按下回车键保存(17.6.16)。
.png)
17.6.16
- 在"VRPN_Button(Script)"模块中的"Tracker"输入框输入手柄的名称(joystick1、joystick2),勾选上"Debug log" 方便打印日志信息(17.6.17),若连接第一个手柄则输入"joystick1"并按下回车键,此处的"Channel"值表示响应的手柄键位的编号;
.png)
17.6.17
- 在"VRPN_Analog(Script)"模块中的"Tracker"输入框输入手柄的名称(joystick1、joystick2),"Channel"设置为0(17.6.18)。
.png)
17.6.18
实时驱动Tracker
- 当上述配置均设置完成后,将"VRPN_Button(Script)"模块中的"Channel"值设置为1按下回车键保存配置,点击播放切换到"Sence" 显示出场景,移动刚体后,Unity中的物体也会被同步驱动,此时按下手柄上的编号为"1"的按键,Unity中"Console" 会打印出手柄键位的信息,"Button 1 Hold"表示手柄的按键1被按下,"Button 1 Up"表示手柄的按键1按下后被松开(17.6.19)。
.png)
17.6.19
- 若需要使用手柄的其他按键,在"VRPN_Button(Script)"模块中将"Channel"值设置为对应的编号即可。
- 若使用手柄轮盘,无需在"Channel"中进行设置,直接滑动轮盘即可,"VRPN_Analog(Script)"模块中的"Analog"坐标值会实时变化(17.6.20);
.png)
17.6.20
- 位移和旋转的反转:在使用刚体实时驱动Unity场景中的物体时,可以对刚体数据的位移和旋转进行反转,在"VRPN_Tracker(Script)" 模块中的"Position Tracking"表示刚体的位移,"RotationTracking"表示刚体的旋转,勾选"X、Y、Z"则代表将"X、Y、Z" 轴的坐标值进行反转(17.6.21)。
.png)
17.6.21