(4)CUDA Installation
Confirm the CUDA Version Supported by the GPU
- To check the CUDA version supported by your graphics card: Press Win + R, enter cmd, and open the command prompt. Run the command: nvidia-smi. The displayed interface shows the maximum CUDA version supported by the system. In this guide, CUDA 13.0.1 is selected for installation.
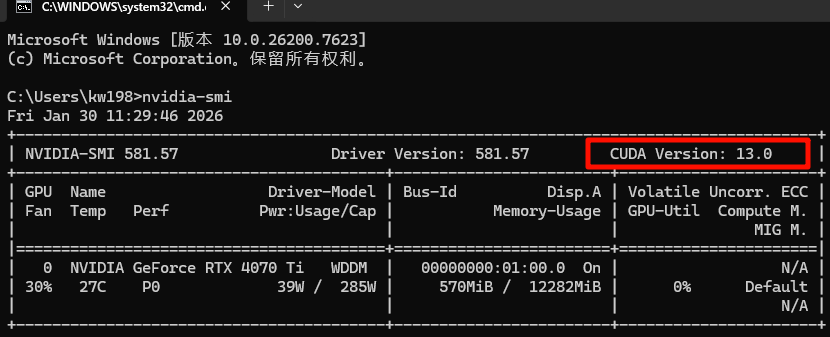
2、If the device's driver does not support CUDA 13.0, you will need to manually download the corresponding driver. The NVIDIA driver download page:https://www.nvidia.cn/drivers/lookup/。Download and install the appropriate driver based on your computer model.
CUDA Download
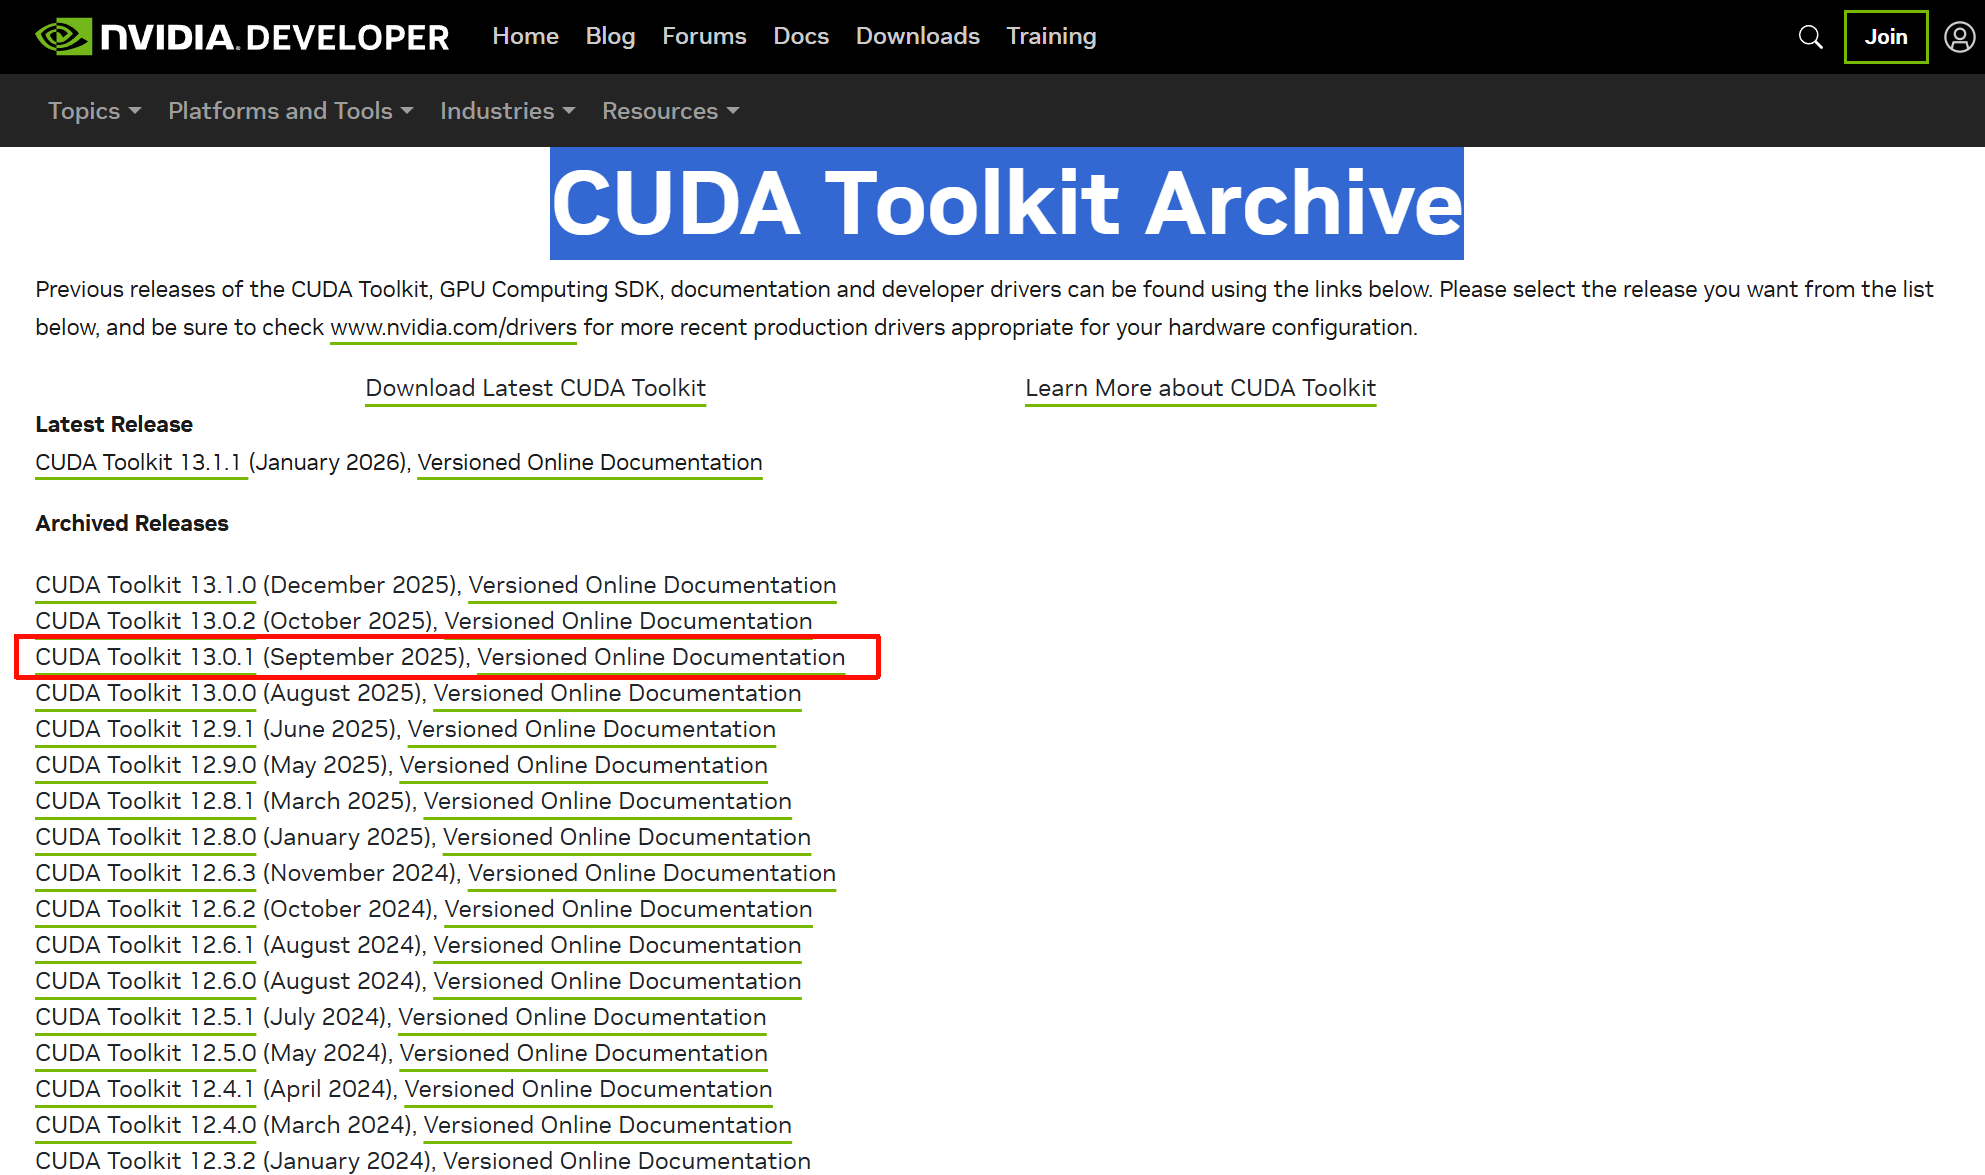
- Open the official download page: https://developer.nvidia.com/cuda-toolkit-archive, select CUDA 13.0.1 for download.
- Follow the prompts to select the operating system version that matches your computer.
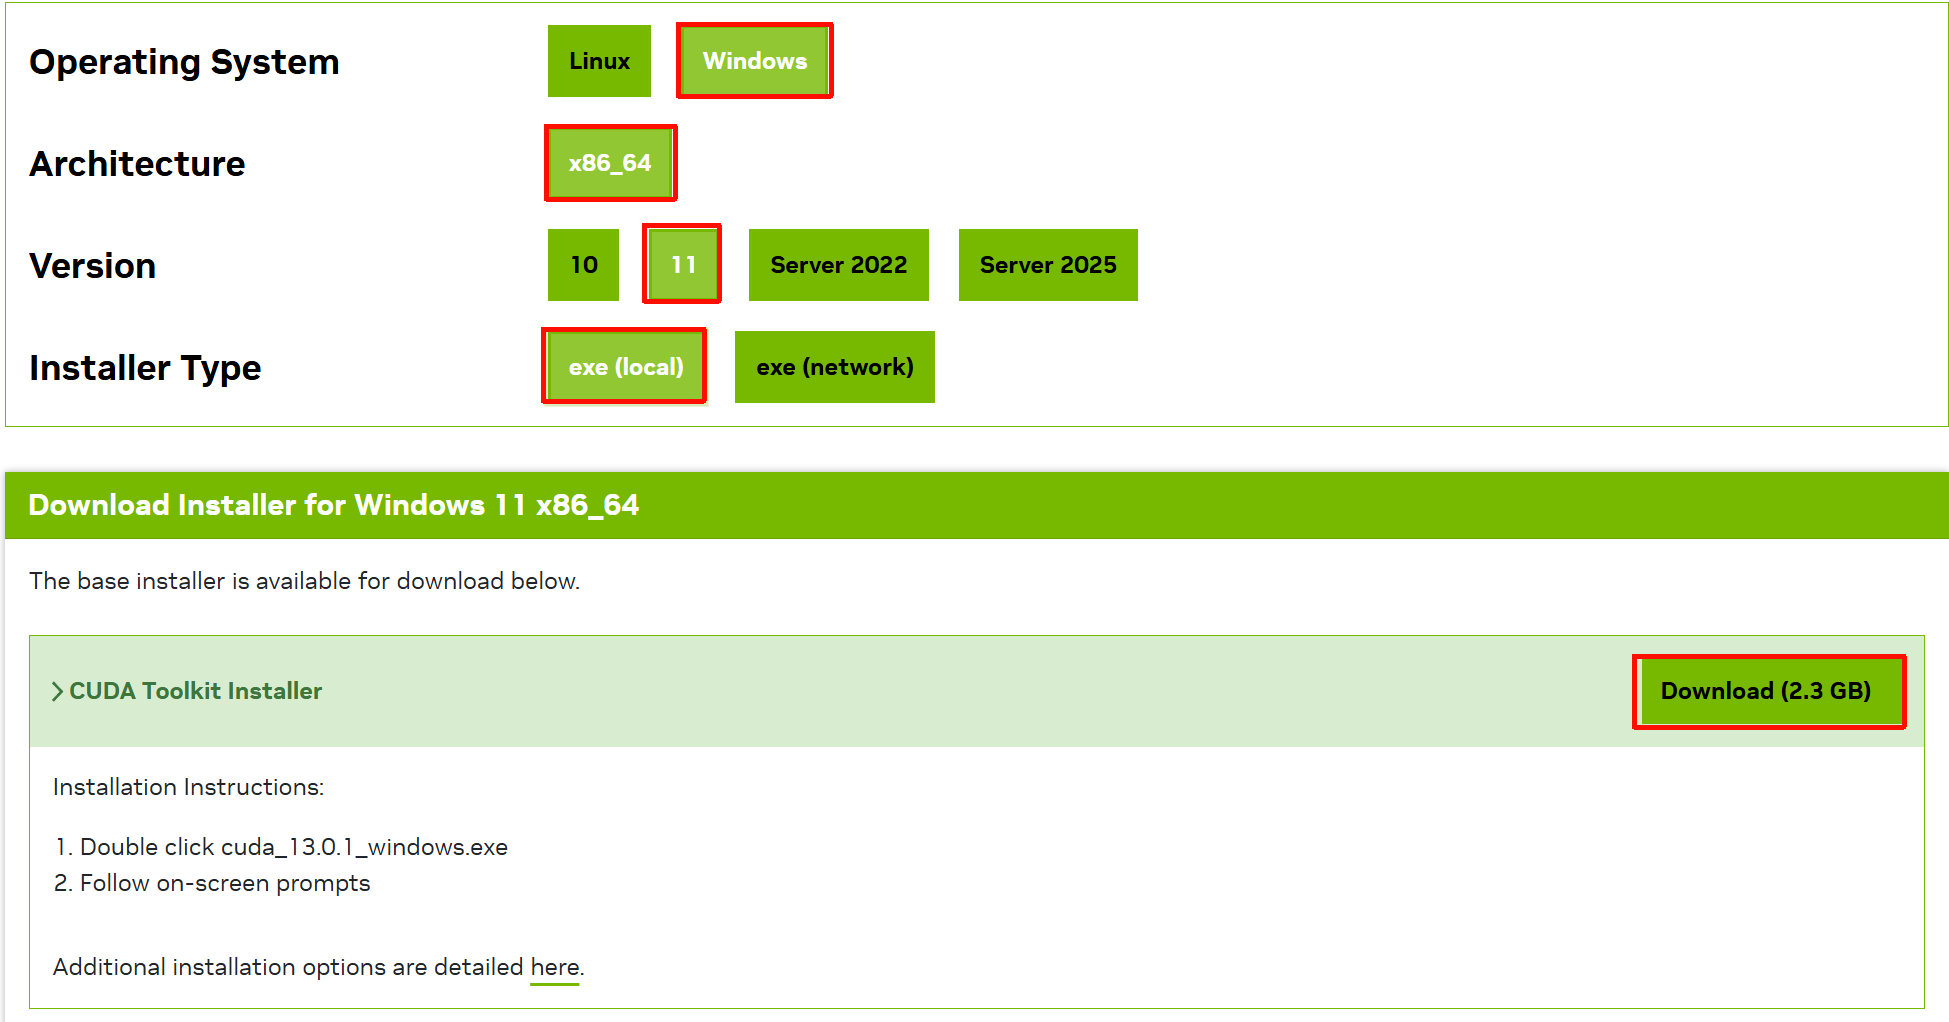
CUDA Installation
- Double-click the downloaded installer to open the installation interface. During the system check, select “Agree and Continue”.
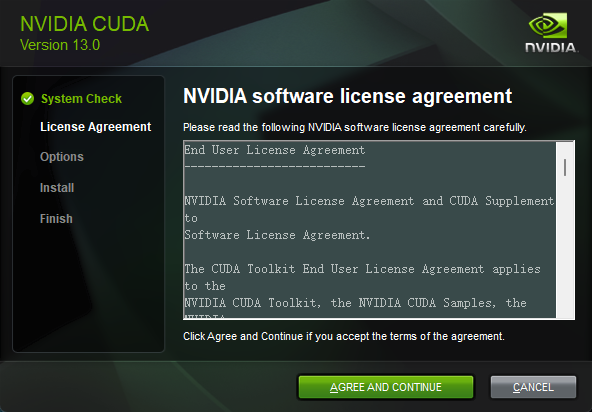
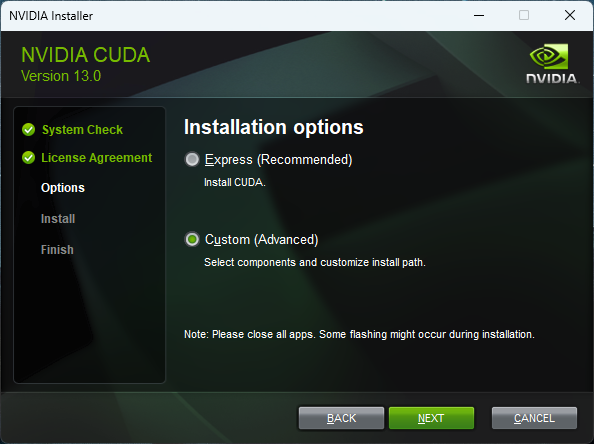
- License Agreement: select “Custom”, then click Next.
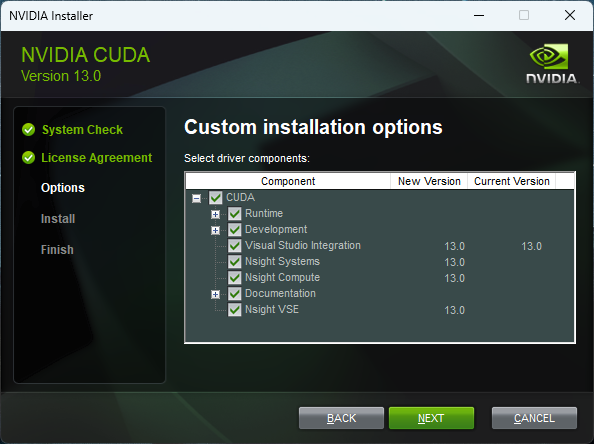
- Options: select all components.
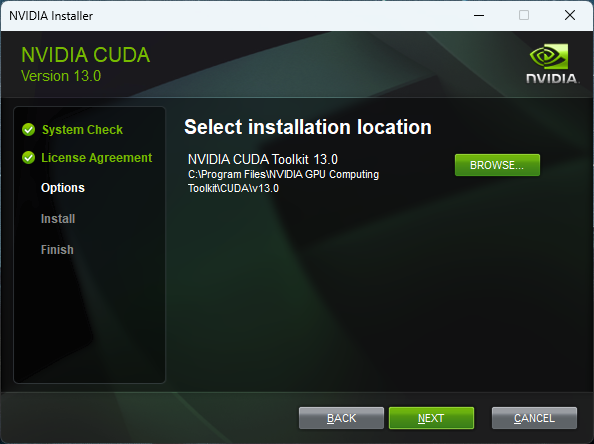
- Installation path: it is recommended to use the default path, as this path will be required later. Click Next to proceed.
5、Add CUDA environment variables: Environment variables are usually automatically set up; verify them through Computer Properties -> Advanced System Settings -> Environment Variables -> System Variables.

Verify CUDA Installation
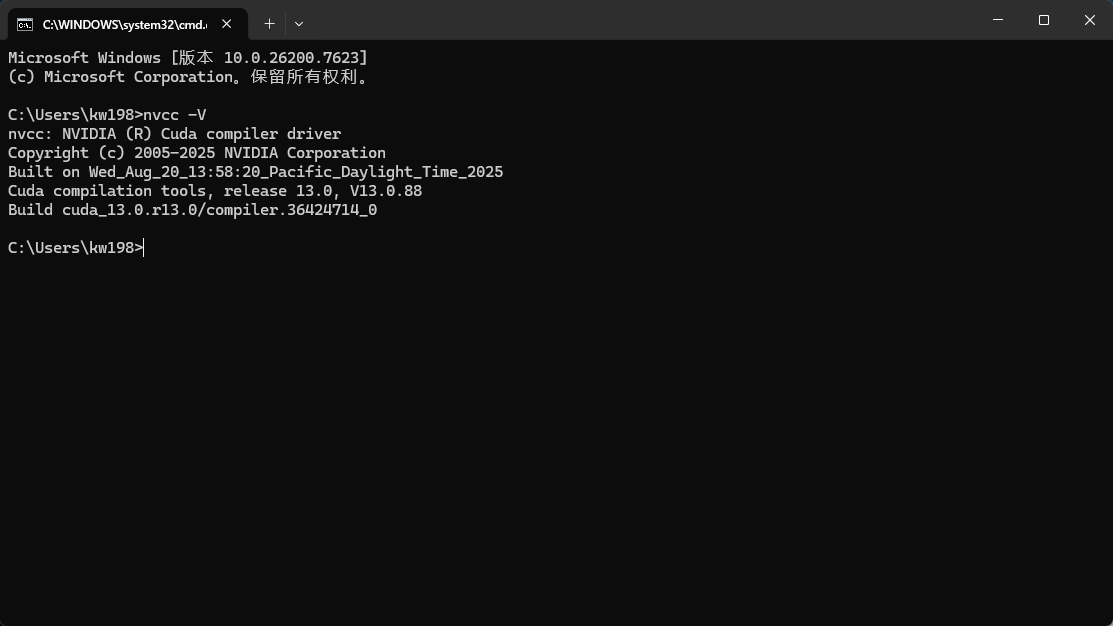
Press Win + R, enter cmd, and open the command prompt. Run the following command: nvcc -V. If the information shown in the figure appears, CUDA has been installed successfully. Otherwise, the installation has failed.
cuDNN
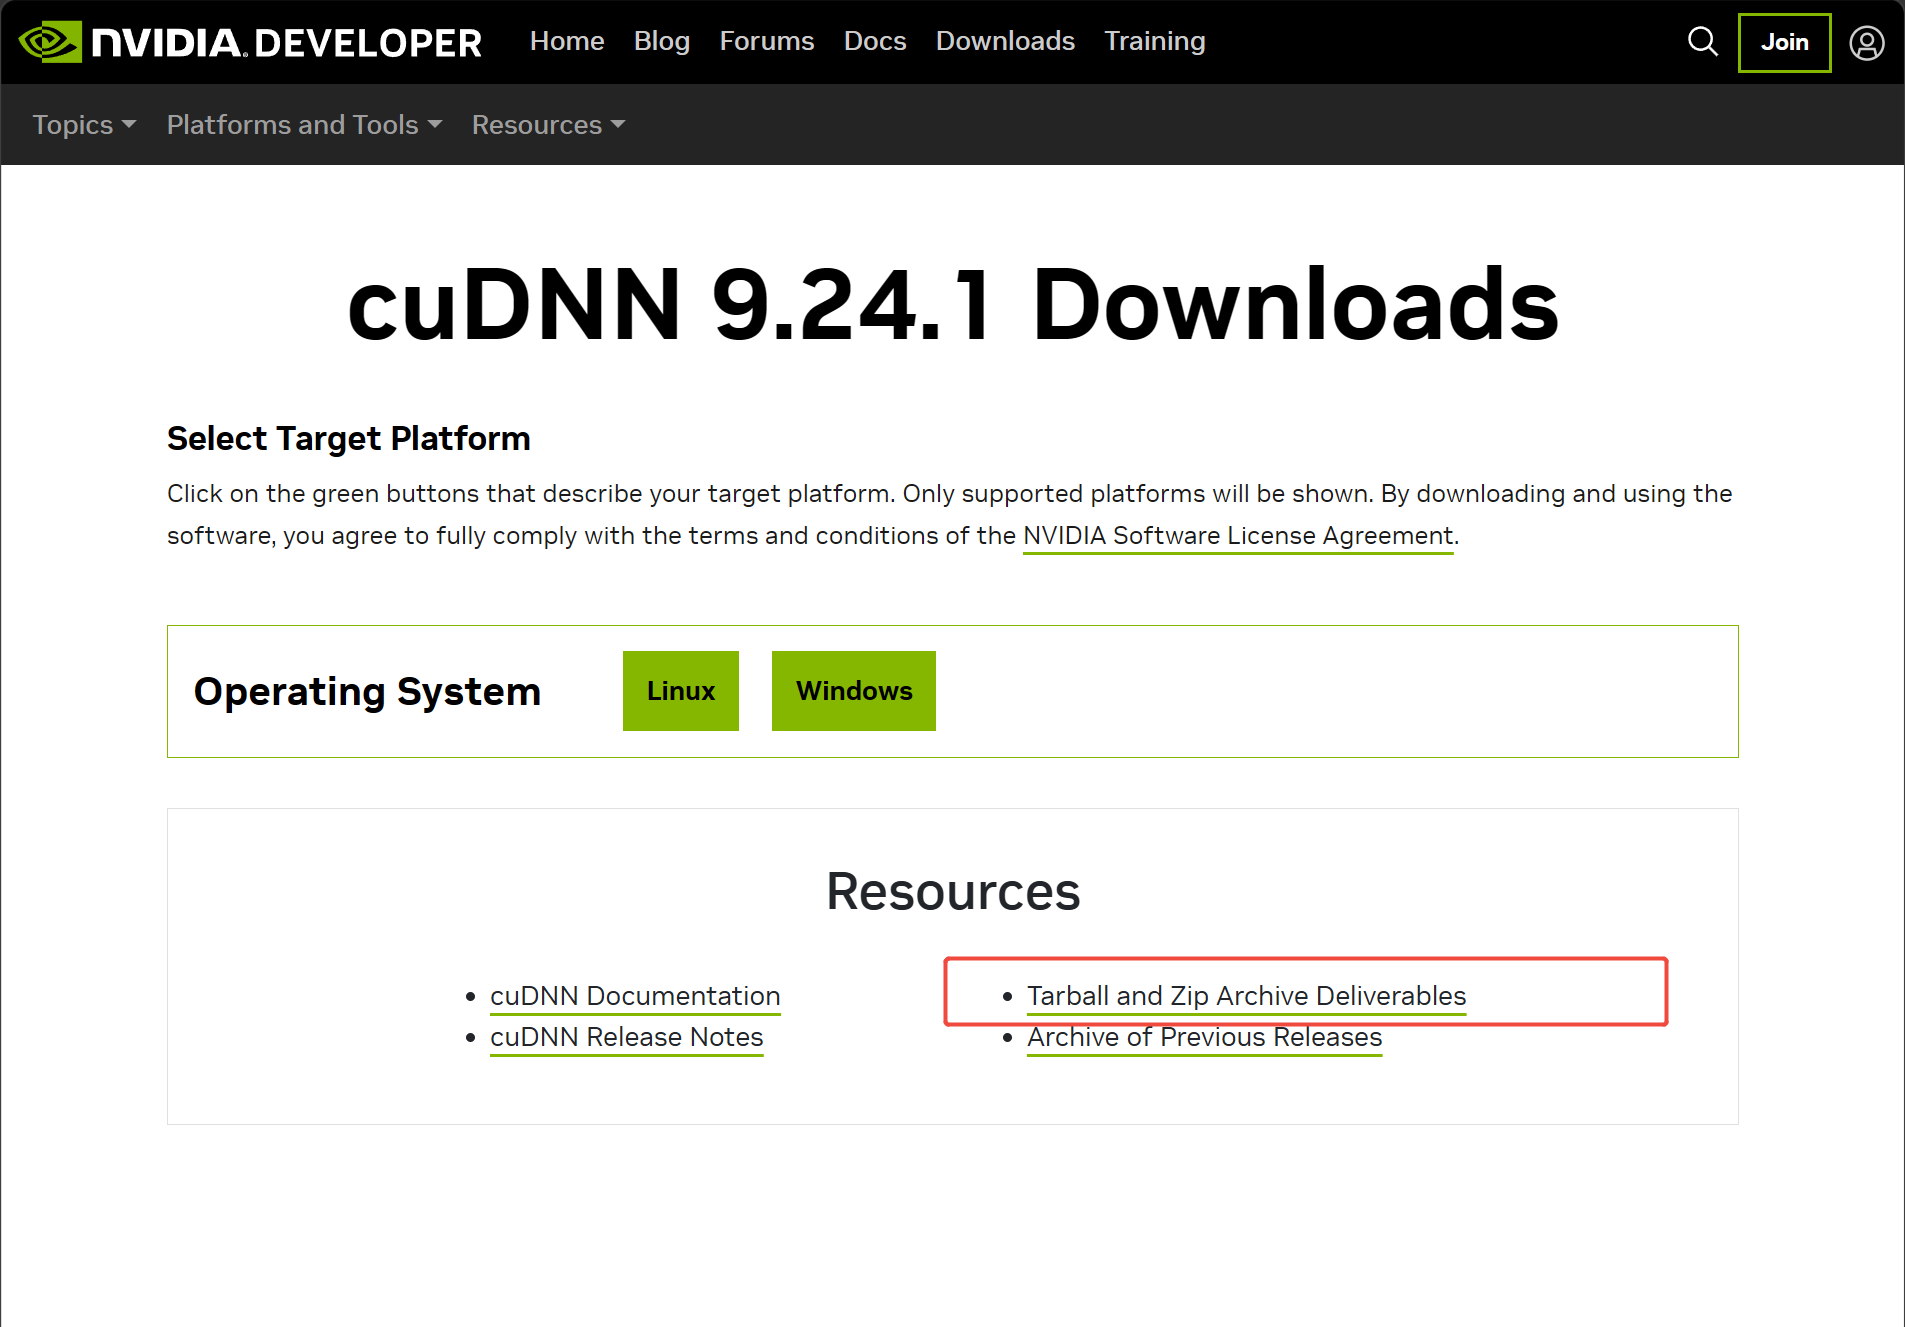
1、First, you need to click on the download link on the official website:https://developer.nvidia.com/cudnn-downloads,Click on the red box option in the following picture, load it in, then click on cudnn, select the Windows version, and choose the corresponding cudnn based on the CUDA version. After that, simply download it.
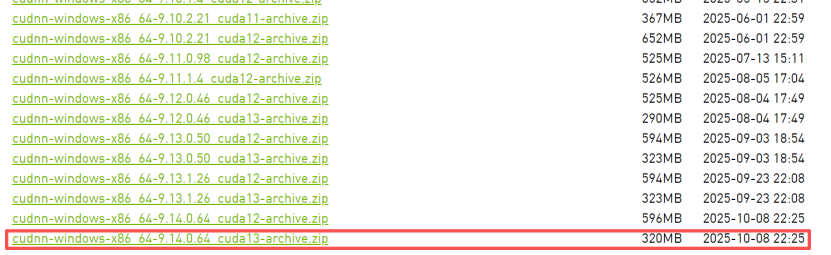
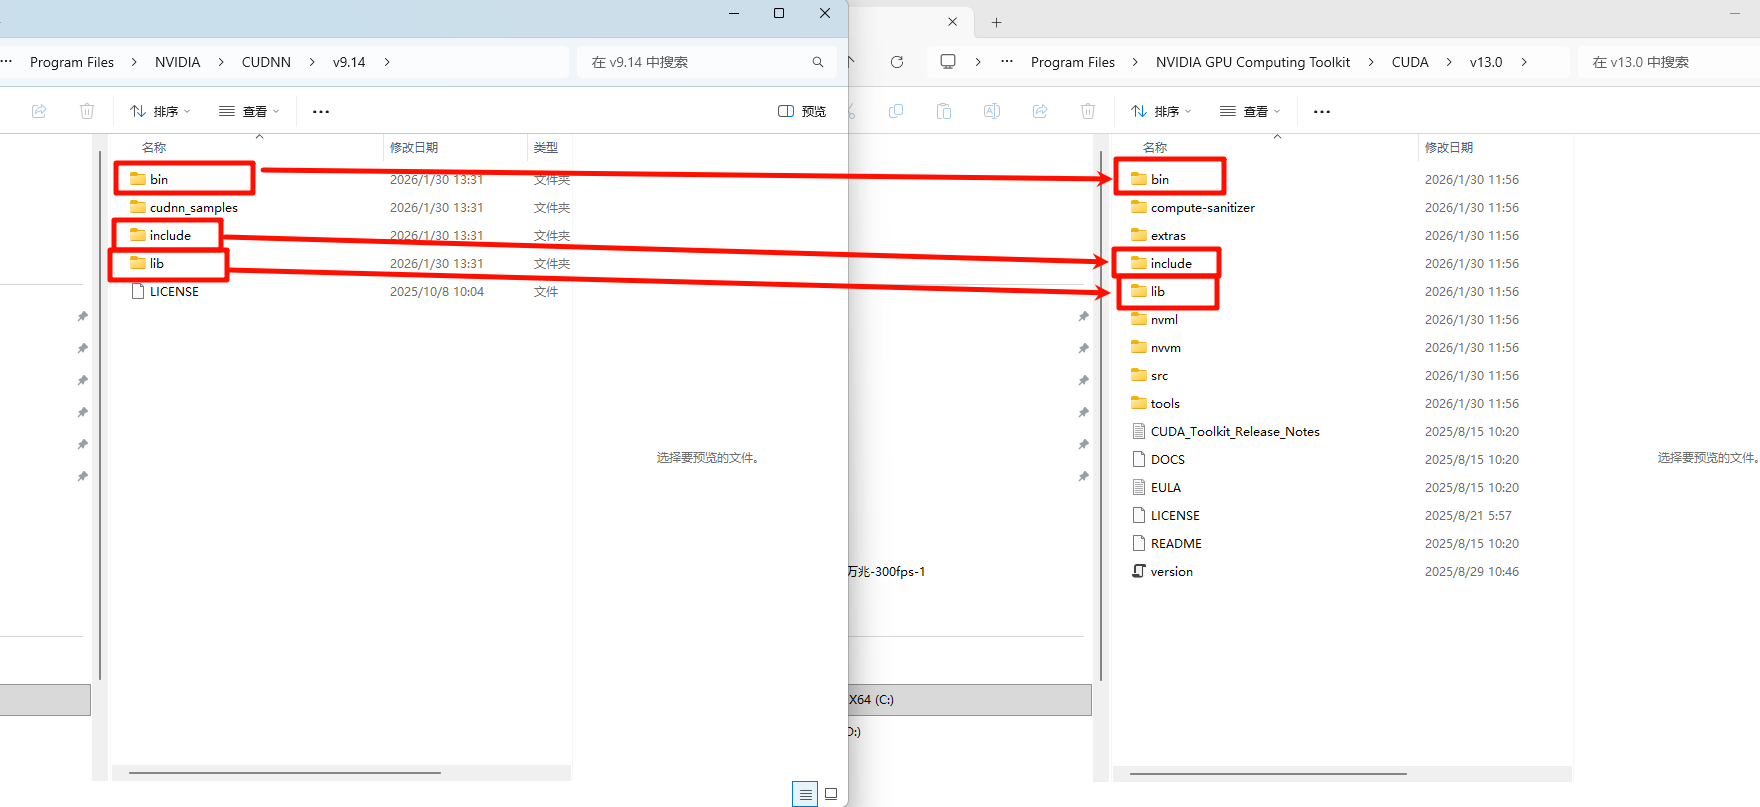
2、After downloading and decompressing, locate the installation path of CUDA. Then, copy all the contents of the cudnn folder to the corresponding directory of CUDA, as shown in the following picture.
3、Environment variable configuration: Open the system variables, edit the Path variable, and make sure to have the four environment variables as shown in the picture. If any are missing, simply add the corresponding ones.
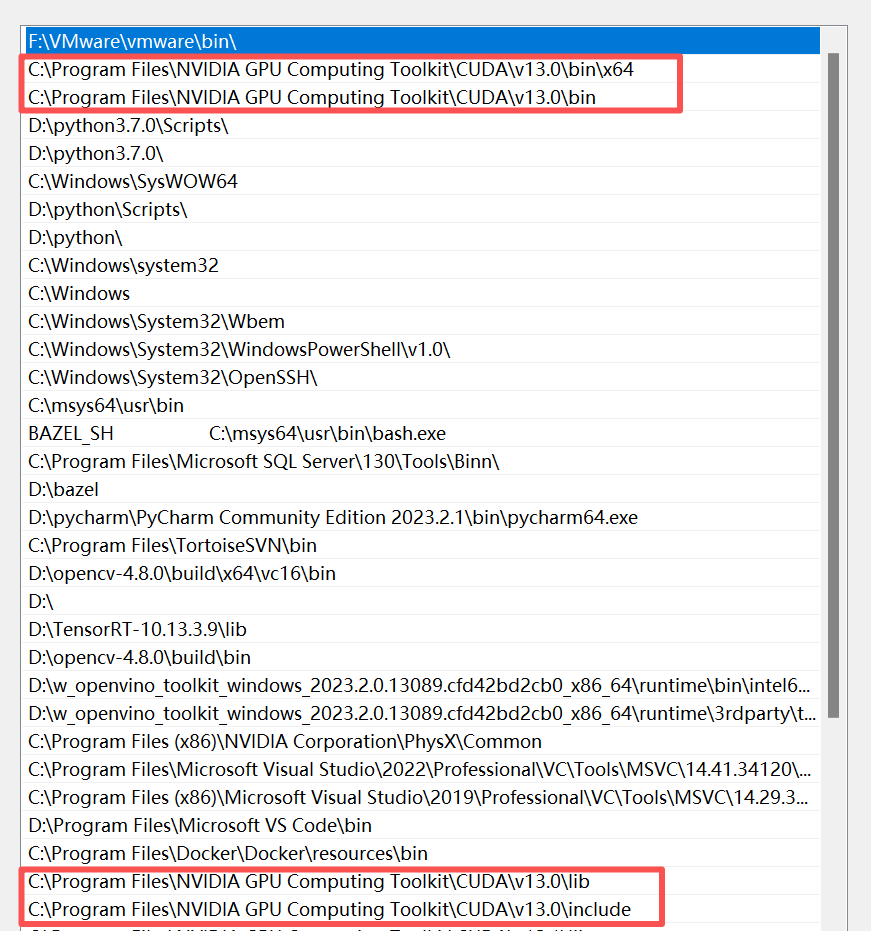
Note: After configuring the environment variables, you need to restart the computer. This completes the installation of CUDA and cuDNN.
TensorRT
1、First, you need to click on the download link on the official website:https://developer.nvidia.com/tensorrt/download/10x#,Download the TensorRT version 10.13.3.9.
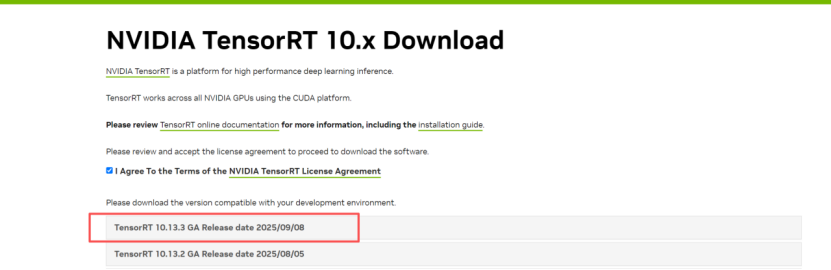
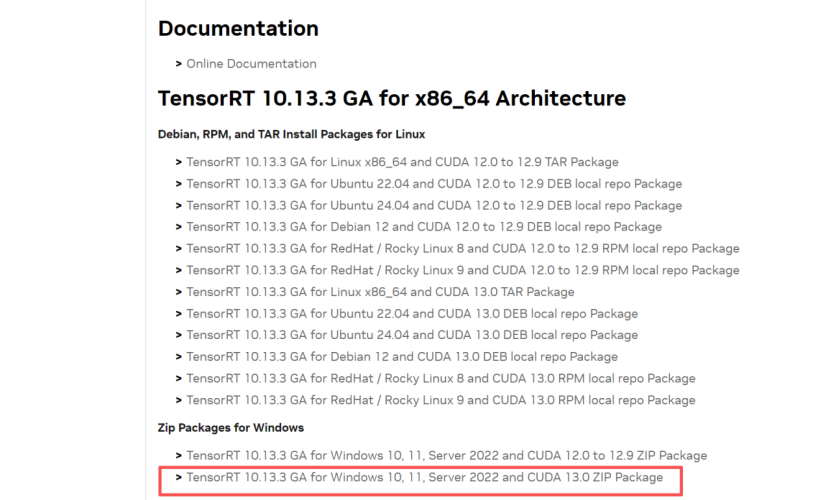
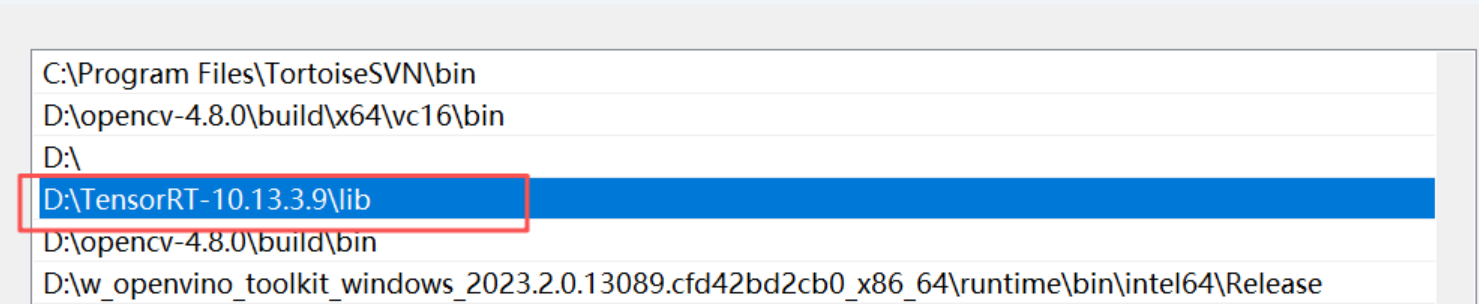
2、Add environment variable: Add the corresponding path of TensorRT-10.13.3.9 to the system's environment variables.