(Ⅱ) mocap_nokov
https://wiki.ros.org/mocap_nokov
Ⅰ. Source Code Compilation and Installation of mocap_nokov
- Run the following commands in sequence to compile and install mocap_nokov.
mkdir -p ~/catkin_mocap/src</code>
cd ~/catkin_mocap/src/
git clone https://github.com/NOKOV-MOCAP/mocap_nokov.git
- Install dependencies and compile using catkin_make.
cd ~/catkin_mocap/
rosdep install --from-paths src -y --ignore-src
catkin_make
.png)
Ⅱ. Configure Environment
- Use the following commands to configure the environment and load the environment in this terminal.
source ~/catkin_mocap/devel/setup.bash
echo 'source ~/catkin_mocap/devel/setup.bash' >> ~/.bashrc

Load Environment
Ⅲ. Enable SDK
- In the motion capture software data broadcast, select the address on the host that is on the same network segment as the onboard computer. Set the mode to multicast, select global for skeleton coordinates, and enable SDK.
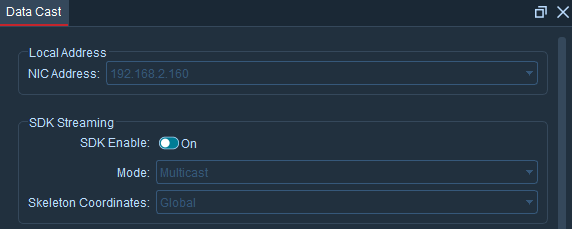
SDK
Ⅳ. Configure mocap.yaml File
- Use the following command to modify the mocap.yaml file.
vim ~/catkin_mocap/src/mocap_nokov/config/mocap.yaml

mocap.yaml
- In the "rigid_bodies" field, add the topics required for the rigid body to be tracked. Taking the rmtt_1 rigid body as an example, open the asset in the motion capture software, find the asset number "0" of this rigid body, and add the configuration as follows. server_address is consistent with the address selected in data broadcast, which is 192.168.2.160.
rigid_bodies:
    '0':
        pose: rmtt_1/pose
        pose2d: rmtt_1/ground_pose
        odom: rmtt_1/Odom
        tf: tf
        child_frame_id: rmtt_1/base_link
        parent_frame_id: world
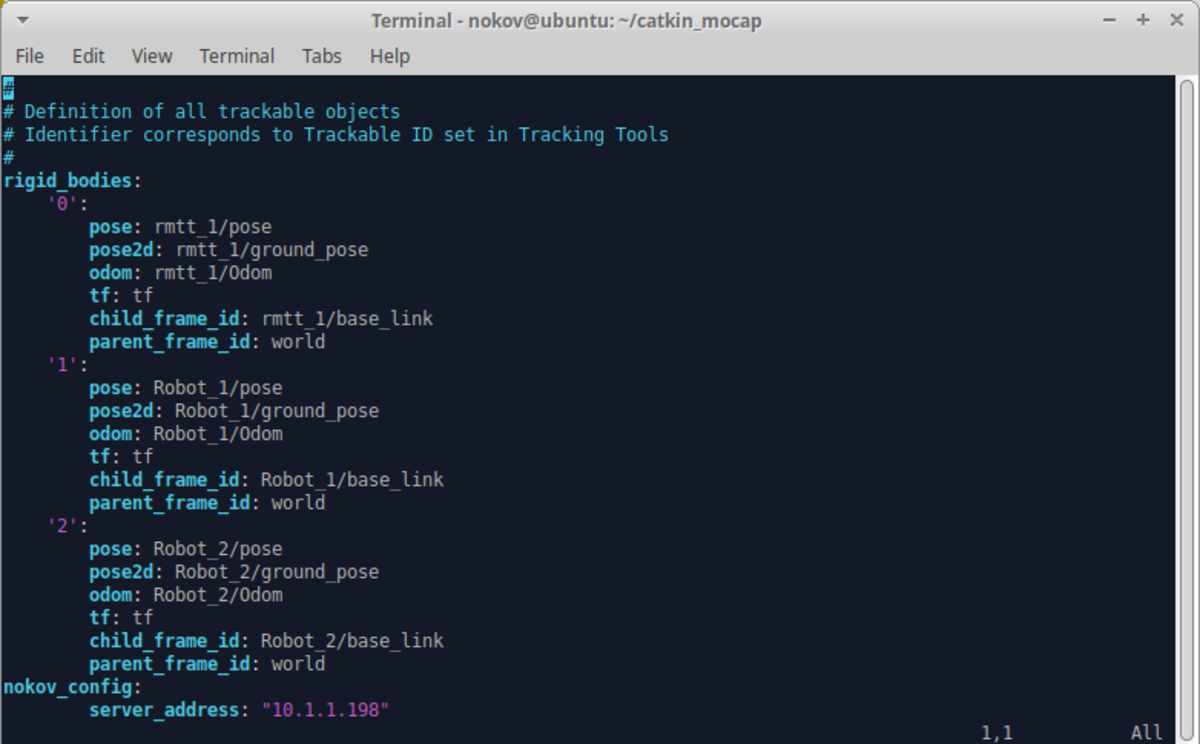
rigid_bodies Field
Ⅴ. Launch mocap_nokov
- Use the following command to launch mocap_nokov.
roslaunch mocap_nokov mocap.launch
.png)
Run mocap_nokov Node
- Open another terminal to print topics.
rostopic list
.png)
Topic List