8. Calibration-free
1.Anchor Calibration
Create Anchor Point
- Please place Marker points around the edge of the capture scene, ensuring that they are positioned at the scene's boundary and can be reconstructed in the 3D view. Next, click "Freeze Frame" to freeze the 3D view. Select the Marker points where you want to create anchor points, right-click, and choose "Create Anchor" Once the anchor points are created, the Markers in the 3D view will change from white to red.
The number of supported anchor points is between 5 and 100.
Delete Anchor Point
- First, pause the software playback, open the calibration panel, click on the gear button on the right side of the panel to open the calibration settings, select "Calibration-Free," and then click on the "Delete Anchor Point" button. After clicking, the anchor point will be deleted (8.7.1).|
.png)
8.7.1
Enable Calibration-Free After
- After creating anchor points, open the calibration panel. In the panel, click the gear button on the right to open the calibration settings, select "Calibration-Free," and check the "Use Calibration-Free" checkbox. Once enabled, the software will perform calibration every hour (version 8.7.2). Alternatively, you can manually trigger calibration by clicking the "Refresh" button. After calibration is completed, the currently loaded calibration file will be automatically updated, and the "Calibration-Free" interface will display the most recent update time.
.png)
8.7.2
Manually Add Anchor Markers
- After creating an anchor marker, if you need to add more anchor markers on top of the existing number of anchor markers, first click the "Freeze Frame" button, box select the unnamed marker where you want to add an anchor marker, right-click and select "Add Anchor" . Then a prompt window will pop up on the software. After clicking "OK," the specified unnamed marker will become an anchor marker and will be displayed in the 3D view(8.7.3);
.png)
8.7.3
After the anchor is successfully created, please do not change the position of the anchor marker arbitrarily, to ensure that the anchor marker created in the 3D view is correctly recognized during the calibration-free period.
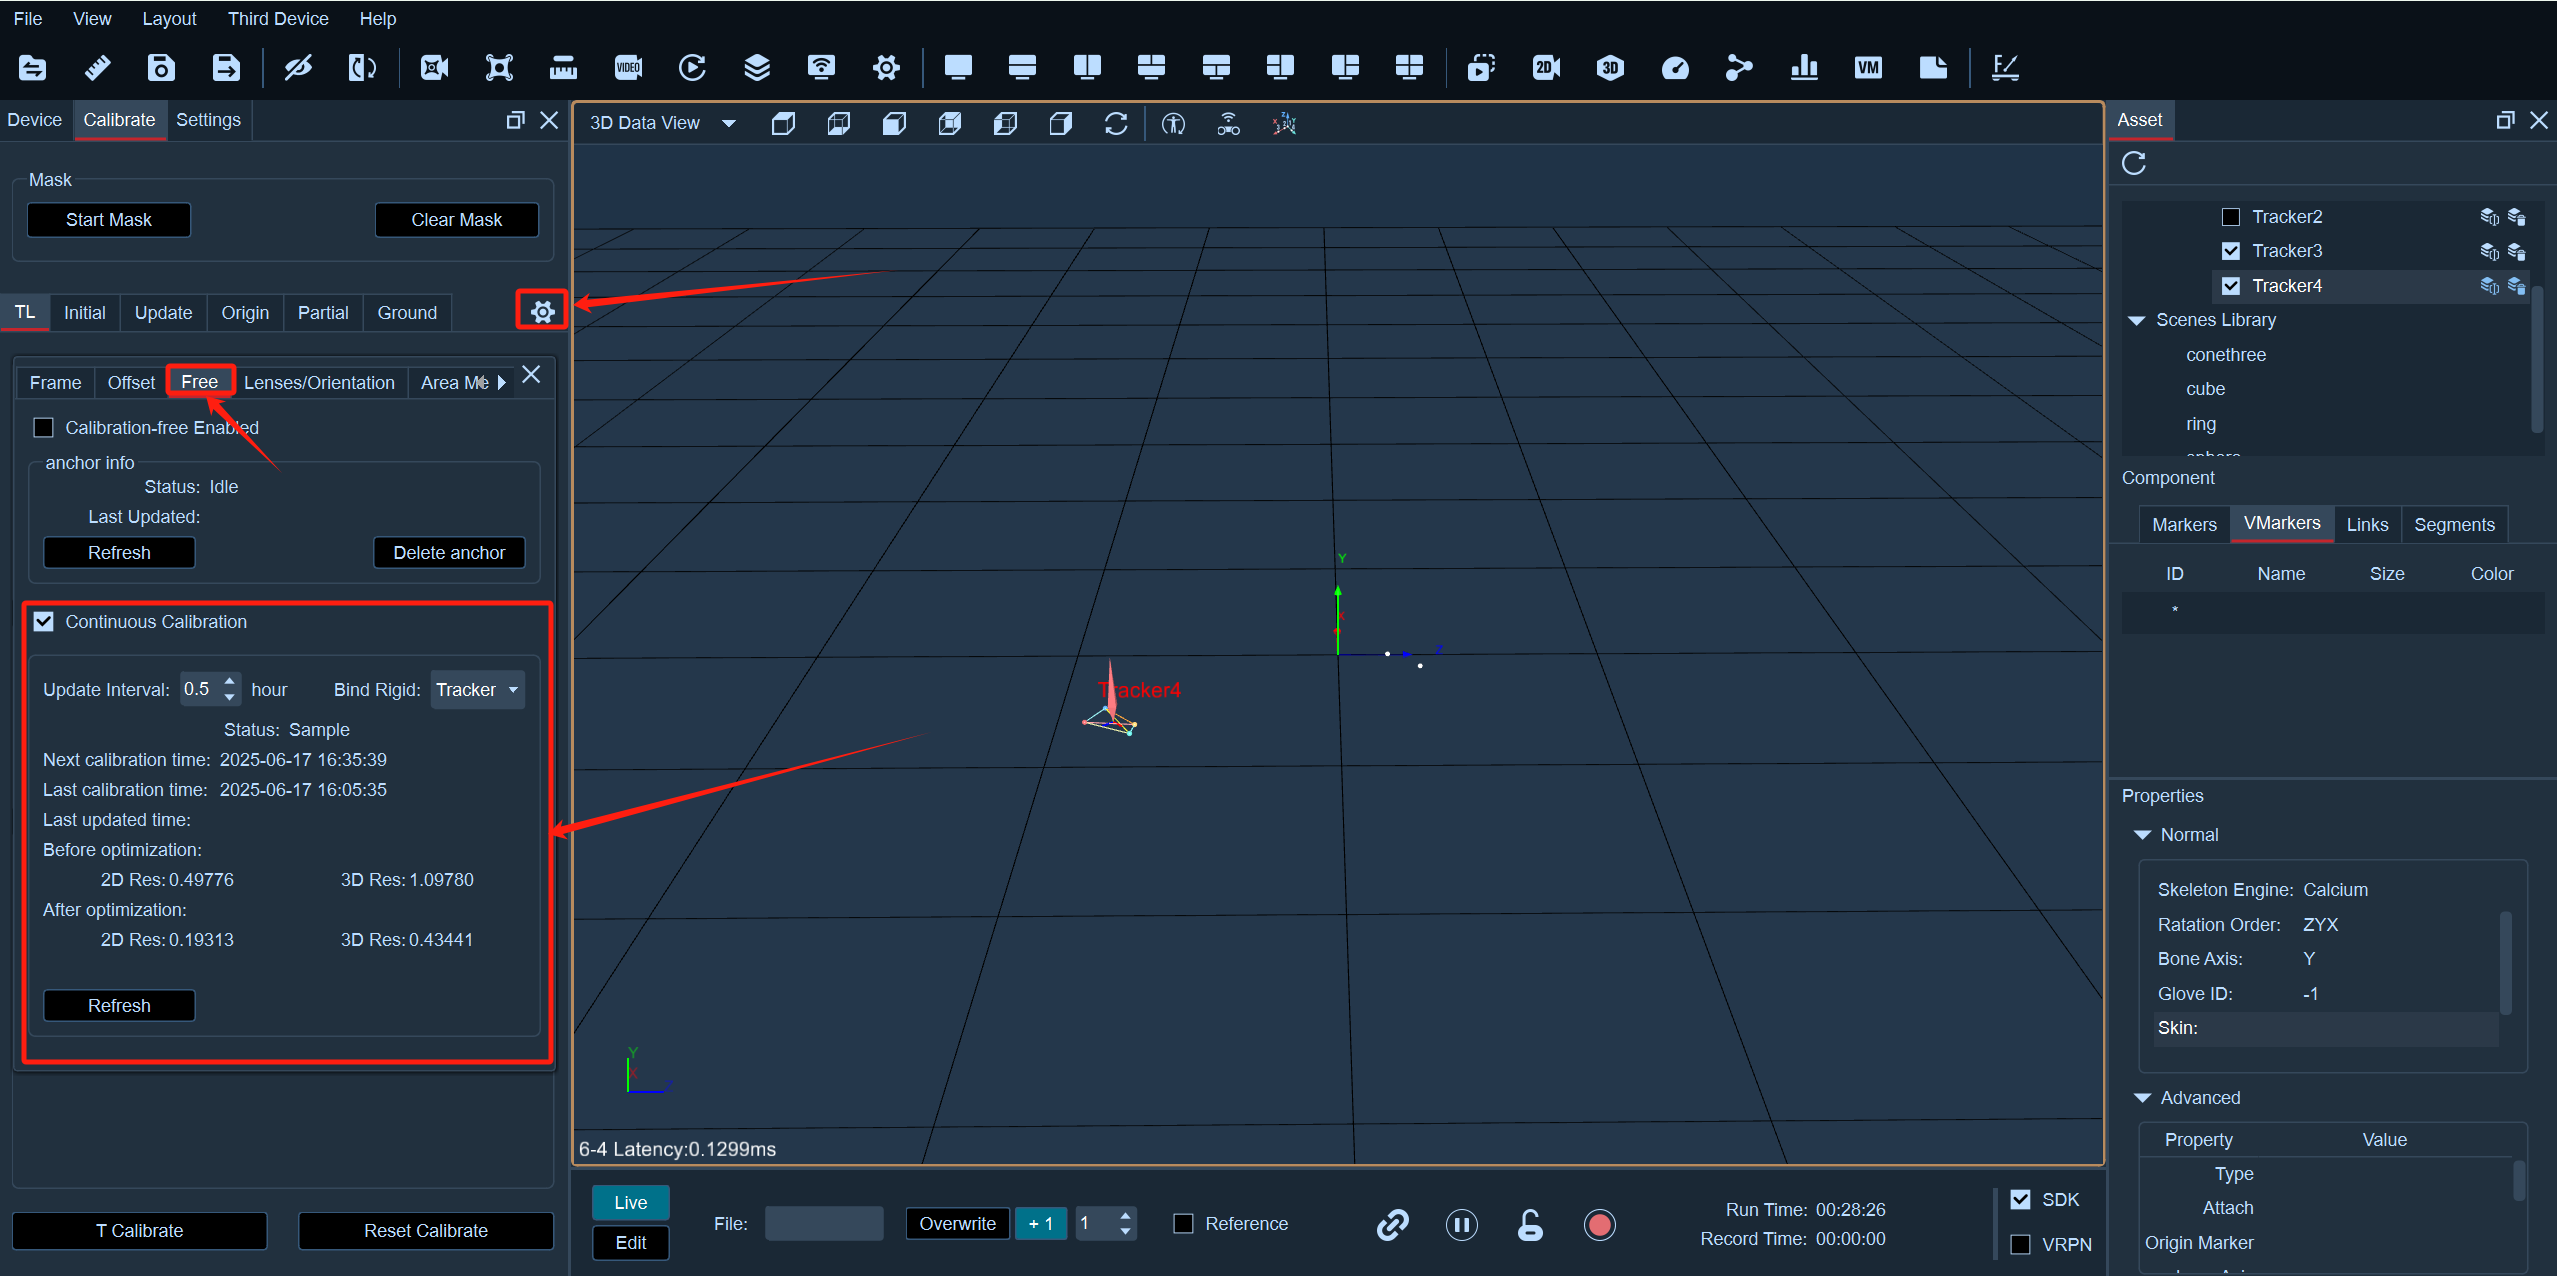
2.Continuous Calibration
Enable Continuous Calibration
Open the calibration panel, then click the gear icon on the right side of the panel to open the calibration settings. Select Calibration-Free Mode and check the Use Continuous Calibration checkbox. Place a rigid body in the field, and after creation, bind the rigid body information. Once the rigid body starts moving in the field, data collection will begin. After enough data is collected, the software will perform a calibration every 30 minutes automatically. You can also manually trigger a calibration by clicking the Refresh button. After calibration is completed, the currently loaded calibration file will be automatically updated. The Calibration-Free Mode interface will display the timestamp of the most recent update.