(X) Optical Lens + Reference Video Calibration
The software supports synchronous calibration of the optical and reference video. After the calibration is completed, the content displayed on the 3D view will be superimposed and displayed on the reference video view.
Hardware Connection
- Insert the synchronization cable behind the main lens with IP 201, and insert the other end of the synchronization cable into the tail cable of the R3V2 camera;

- Power on the optical lens, insert a Gigabit Ethernet cable into the network port of the R3V2 camera, and insert the other end of the Ethernet cable into the switch where the optical lens is located.
- If multiple R3V2 cameras are used for calibration, a one - to - four connecting cable can be used for connection.

- Install the R3V2 camera on the truss or fix it to the tripod, and adjust it to an appropriate angle to face the capture area.
Software connection and settings
- Open the software, click the connection button, and the software will detect the number of optical lenses and R3V2 cameras. Then click play.
- Open Settings - Recording Settings, set the video mode to black and white. For synchronous calibration with the optical lens, it needs to be set to the black - and - white mode. To view the images of the R3V2 camera, the mode needs to be switched to the color mode.
 (1).png)
- Open the 2D view, double - click on an R3V2 camera to enter the single - view mode. Open the device panel and set the threshold and brightness until 2D points can be stably extracted in the view. Then perform the same operations on other R3V2 cameras.
info
If 2D points cannot be extracted in the 2D view of the R3V2 camera, it is because the camera is not synchronized. Please check whether the synchronization cable is loose or misconnected and troubleshoot one by one.
Add network camera configuration
- Click on "Third - Party Devices - Network Camera Configuration" in the menu bar above the software. Fill in the IP of the R3V2 camera, enter any name, and there is no need to fill in the username and password. Add one or more network cameras.
 (1).png)
- Open the reference video view to view the images of the R3V2 camera. The displayed images are related to the video mode you set.
Calibration
- Open the calibration panel, select "TL" calibration, and calibrate the optical lens and the R3V2 camera. For specific operation steps, you can refer to "VIII. Calibration Classification - T - then - L Calibration" mentioned above.
info
Change hint type The R3V2 camera does not participate in 3D reconstruction
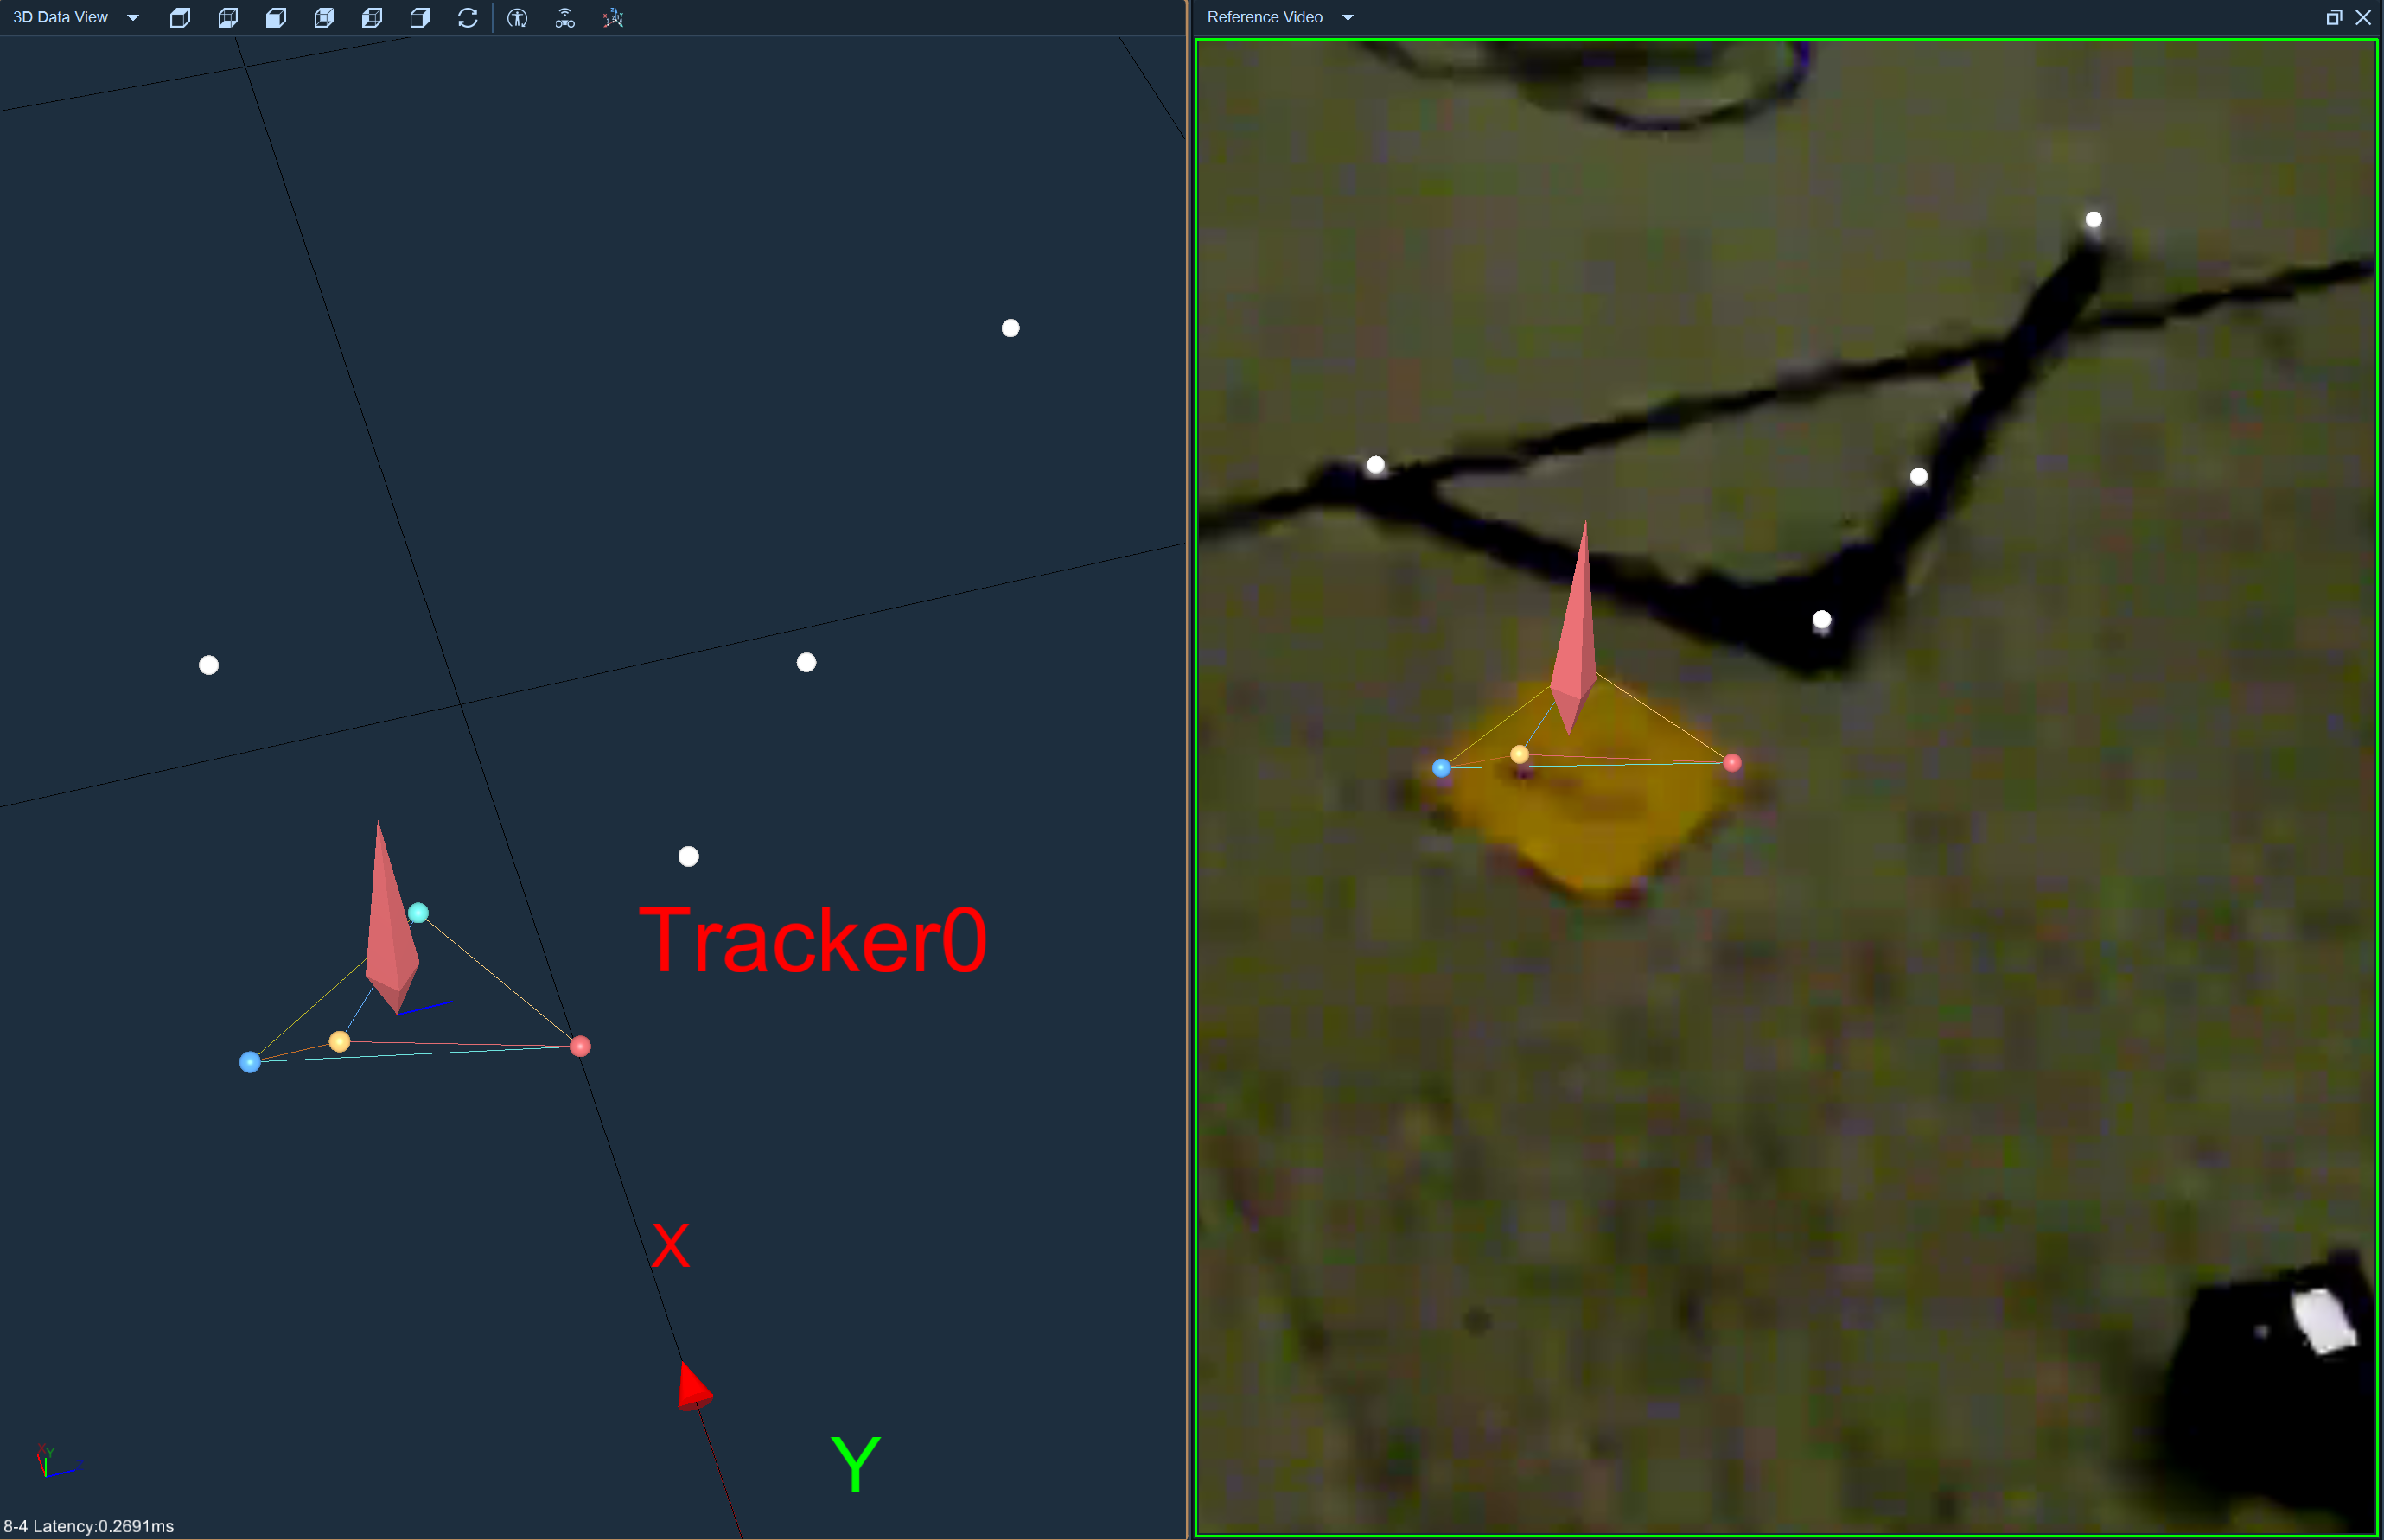
Video Overlay
- After calibration, change the video mode to color mode, open the reference video view and the 3D view. All the content on the 3D view will be overlaid and displayed on the reference video view.
Video offset
- When the image lags, open Settings - Recording Settings, and set the video offset frames to offset forward/backward. This can effectively solve the problem of image lag in the reference video.
 (1).png)