(3) Maya plug-in
Plugin installation
- Download the latest plugin version: Nokov-MayaPlugin XXX(2018-2022).exe;
- Unzip the plug-in installation package. Double-click the decompressed plug-in and install the plug-in in the software directory (17.5.1). After completion, click Next--Install and wait for the plug-in installation to be completed (the application of gloves and human body in Maya is the same as below).
.png)
Settings and usage of Maya
- Click "Window - Settings/Preferences - Plug-in Manager", search for "Plugin" in it, and check the two windows of " PluginMaya.mll" (17.5.2). When the mouse is placed on the icon, detailed information can be seen;
.png)
- Close the plug-in manager. In the MLE window below Maya, search for "NokovPluginWindow" and press Enter to call up the plug-in (17.5.3).
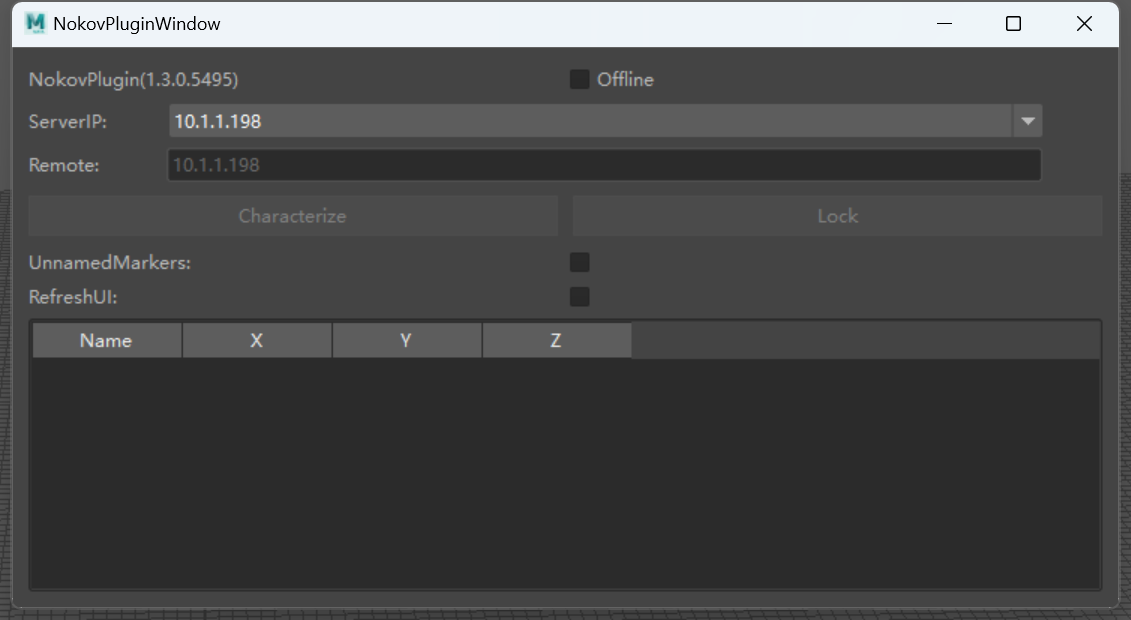
- Select the network card address consistent with the software, click "Offline" to change it to the "Online" state. Check "RefreshUI", and after playing the motion capture software, Maya starts to continuously receive data from the motion capture (17.5.4).
.png)
- After the human body in the software moves, the model in Maya will be driven and move synchronously (17.5.5).
.png)
tip
Note: Since Maya's bone nodes do not allow numeric names, the human body Markerset name in the software cannot start with a number or be purely numeric. Otherwise, the skeleton will not be displayed in Maya.
Characterization
- In Maya, manually create the characterization of motion capture human body data. After Maya obtains the human body data, click the "Characterize" button in the plug-in window, click the "Switch character control" option in the upper right corner, and then click "Create character definition".
.png)
- Perform the "Assign Selected Bone" operation on each bone of the character. After all the bones are bound, the characterization is successful.
.png)
- Import the model to be driven into Maya. Repeat the above steps to create characterization for the imported model. After completion, select character2 for the character on the right and character1 for the source to achieve the binding of bones and the model. After playing, the model will be driven.
.png)
Characterize
- After obtaining human body data, click the "Characterize" button in the plug-in window. In the scene, the human body posture will be forcibly changed to the standard T-Pose posture.
Lock
- After clicking the "Characterize" button in the plug-in window, the data will stay at the current frame. After clicking the Lock button to unlock, you can continue to receive human body data from the Live software.
- The human skeleton of Live needs to be consistent with the skeleton posture of the imported model. Therefore, before characterizing, you can click the "Characterize" button first, and then perform the role definition of the AI Mocap human body data and the imported model (it is recommended to import a model with a standard T-Pose posture). After selecting the correct role and source, click the Lock button to unlock. In this way, the postures of the AI Mocap human skeleton and the model will remain consistent during movement.
ServerIP
- After opening the NokovPluginWindow plug-in window, click ServerIP to expand the drop-down box for IP selection. In the drop-down box, all IP addresses of the current host will be displayed. Select the IP address in the same network segment as the software broadcast address. By default, "10.1.1.198" is selected. You can also select "input the remote ip" in the drop-down box and manually enter the IP address in the "Remote" input box below. Check the Online checkbox to connect the motion capture data.
.png)