(Ⅱ) Origin Calibration
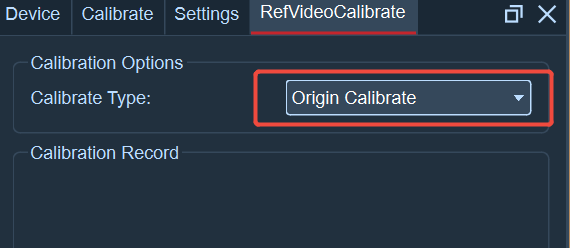
After completing the 6-point calibration, the coordinate origin will be displayed in the 3D view. If you need to update the origin position, please open the calibration panel, click the gear button, and set the calibration axis to the Y-axis. Open the reference video calibration panel, set the calibration type to "Origin Calibration", and click the Start Calibration button.
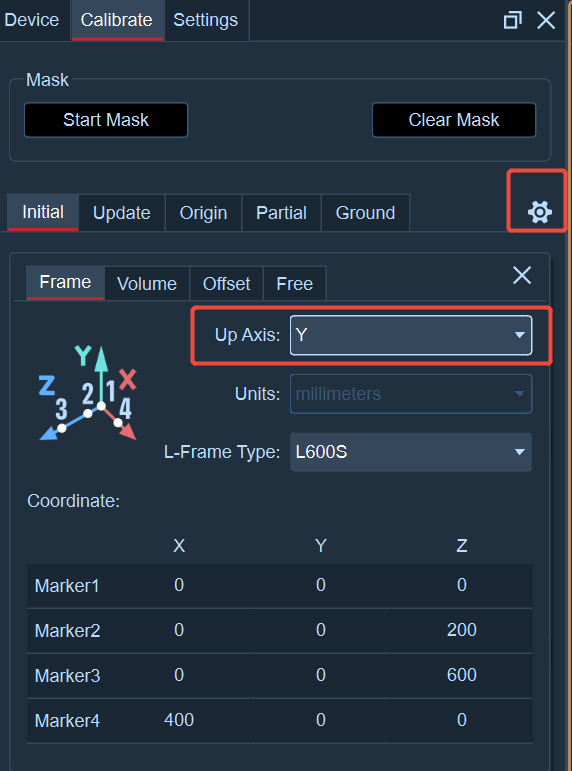
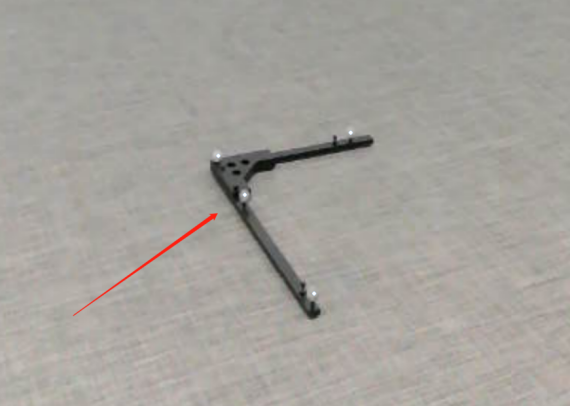
- Place the L-shaped rod in the venue, ensuring that the long axis is aligned with the position to be updated. When the Y-axis is upward, the long axis of the L-shaped rod represents the positive Z-axis direction, and the short side represents the positive X-axis direction.
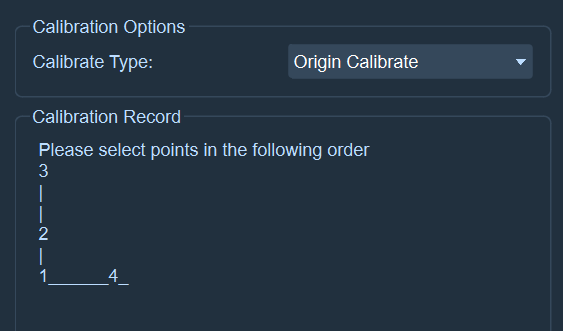
- Click "Freeze Frame" and follow the prompts in the "Calibration Record" to sequentially click the Marker points on the L-shaped rod in the image of each camera.
- After completion, click "Add Frame". At this point, the calibration record will prompt that the L calibration is complete. Switch to the 3D view, and the origin position will have been updated.
Notes:
-
Click the Marker points in the order prompted in the calibration record, sequentially clicking the Marker points at positions "1, 2, 3, 4".
-
If the Marker points of the L-shaped rod are not clear, use the middle mouse button to zoom in or out on the image in the reference video to click the Marker points.
-
When clicking the Marker points, try not to click the wrong position or angle, and click the exact center of the Marker points in the image.