(Ⅰ) Markerless Calibration
- When calibrating using Astra software and loading calibration files after calibration is complete, please close all downloaded input methods on your computer and use the system's built-in Microsoft Input Method.
- When entering the model's height, note that the unit in the input field is millimeters. Convert the height to millimeters before entering it, as incorrect height values will affect the human body rendering effect.
- Clothing color can affect calibration results to some extent. During calibration, the more consistent the color of the upper and lower garments, the better the calibrated human body effect will be.
- During calibration, the model should naturally spread their feet and avoid keeping them too close together.
- Since the Astra system relies on the spatial coordinates of the lens for 3D reconstruction, do not move the lens position or angle once calibration is complete, as this will cause reconstruction anomalies.
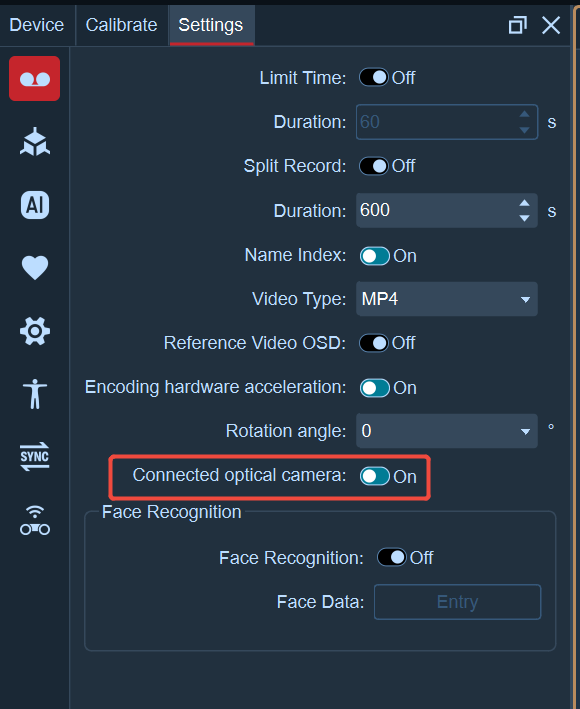
- Open the Astra software, go to Settings--Recording Settings, and turn off "Connect Optical Camera". In Smart Settings, turn on the "Markerless" switch.

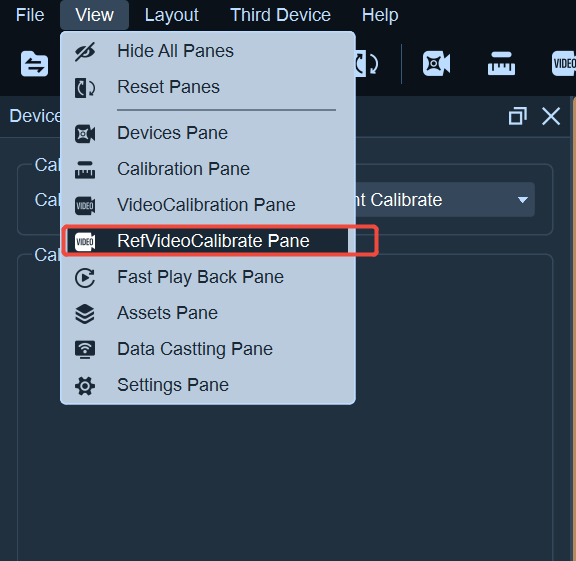
- Open the reference video view, click View--Reference Video Calibration, and select 6-point calibration;
- The calibration personnel enter the venue, click the "Start Calibration" button at the bottom of the calibration panel, enter the height of the calibration personnel in the pop-up window (the unit in the height input field is mm), click the Calculate button after entering, and then click the Save button.
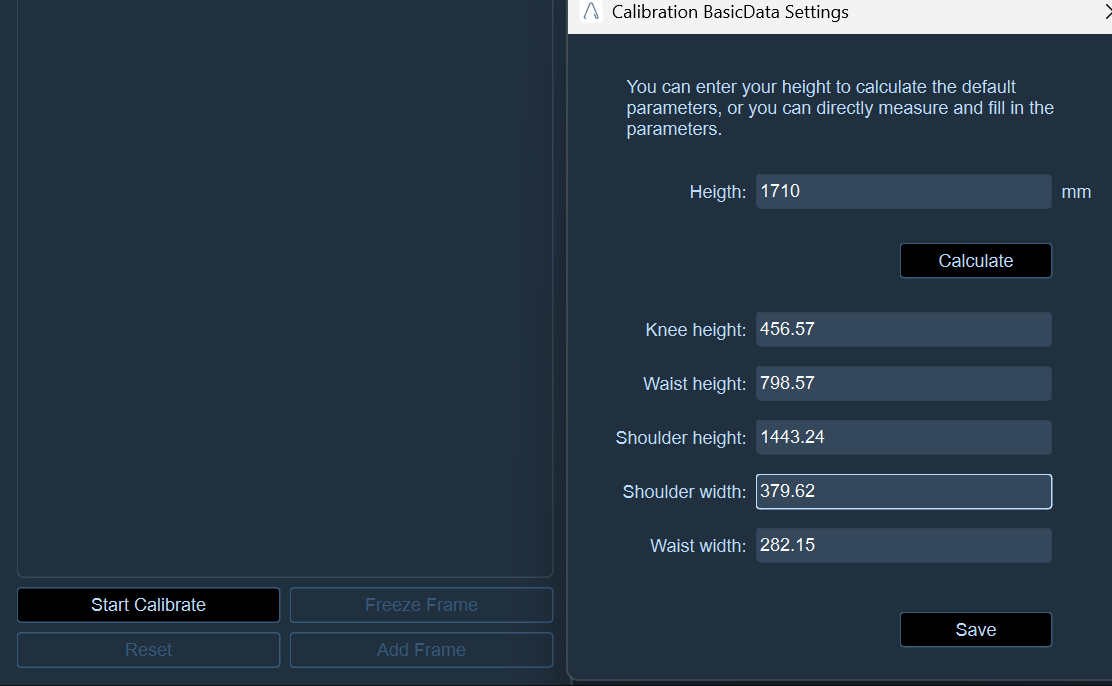
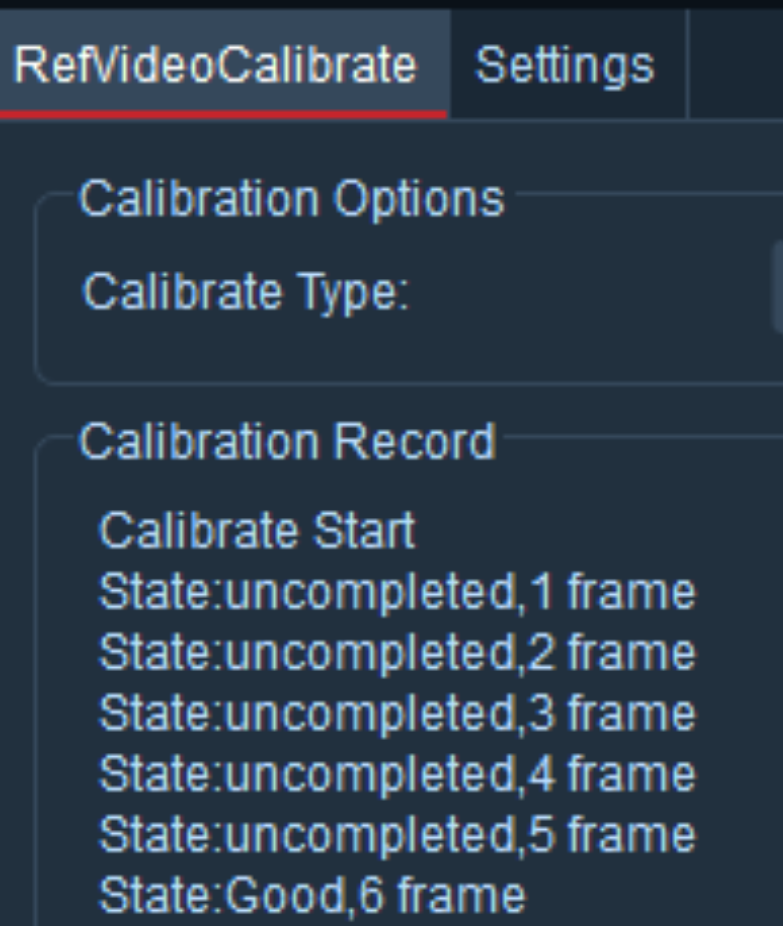
- The calibration personnel stand in APOSE, click the "Freeze Frame" button, then click the "Add Frame" button. After adding a frame of calibration data, the calibration personnel adjust their position again and repeat the above operations to add sample frames until the calibration result is obtained. It is recommended that the calibration result be "Good" or above. If the result is "Poor", we recommend re-calibrating. During the calibration process, the current calibration status and the number of sample frames added will be displayed on the panel.
- After calibration is completed, the calibration file will be automatically saved in the current working directory, and the file name is defaulted to "video.mcal";
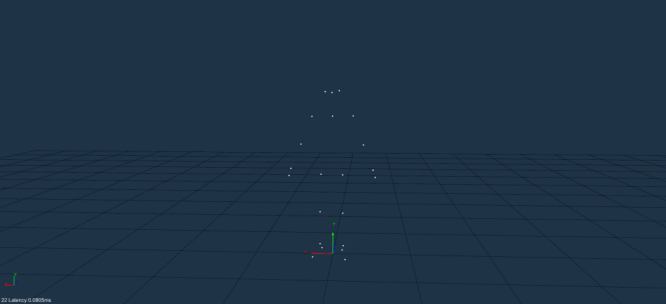
- Switch the view to the 3D view, have the model stand in the visible area of the AI camera, and 22 Marker points of the Markerless human body will be displayed on the 3D view. At this point, you can create a Markerless human body and start using the software.
tip
Calibration Precautions:
-
Before clicking "Freeze Frame", the calibration personnel standing in the venue should observe the images of each camera to ensure that the full body of the model is captured and displayed in the view of each camera.
-
When adding frames at different positions, do not calibrate near the same position; instead, change to multiple different positions for calibration.
-
It is recommended to stand and calibrate in the front, back, left, right, and side positions of the camera, so that the software can collect sample frames with sufficiently high precision for calculation to achieve better calibration results.