(4) Origin Calibration
Origin Calibration Using an L-Shaped Rod
- For the existing calibration file, without calibrating the entire system (that is, without performing T calibration), you can perform L calibration separately to update the coordinate system origin. After the calibration is completed, the original coordinate system origin position on the 3D view will be updated.
- Before performing origin calibration, please first determine the position to be updated. Place the L-type calibration rod in the motion capture area. In the 2D view, at least one quarter of the cameras should be able to completely capture the four Marker points on the L-type rod, and there should be no other noise points in the 2D view except for the four Marker points on the L-type rod.
- Open the calibration panel, select origin calibration, click the gear to open the calibration settings, set the type of L-type rod to be used for this origin calibration. Do not modify the "Calibration Axis Direction".
- Close the origin calibration settings, click the "Origin Calibration" button at the bottom of the calibration panel. After the calibration is completed, click the "Finish" button, save the calibration file for this origin calibration, and if you need to re-calibrate, click the "Reset Calibration" button.
- Switch to the 3D view, the origin position will be updated to the position where the L-type rod is placed.
Custom Origin Calibration
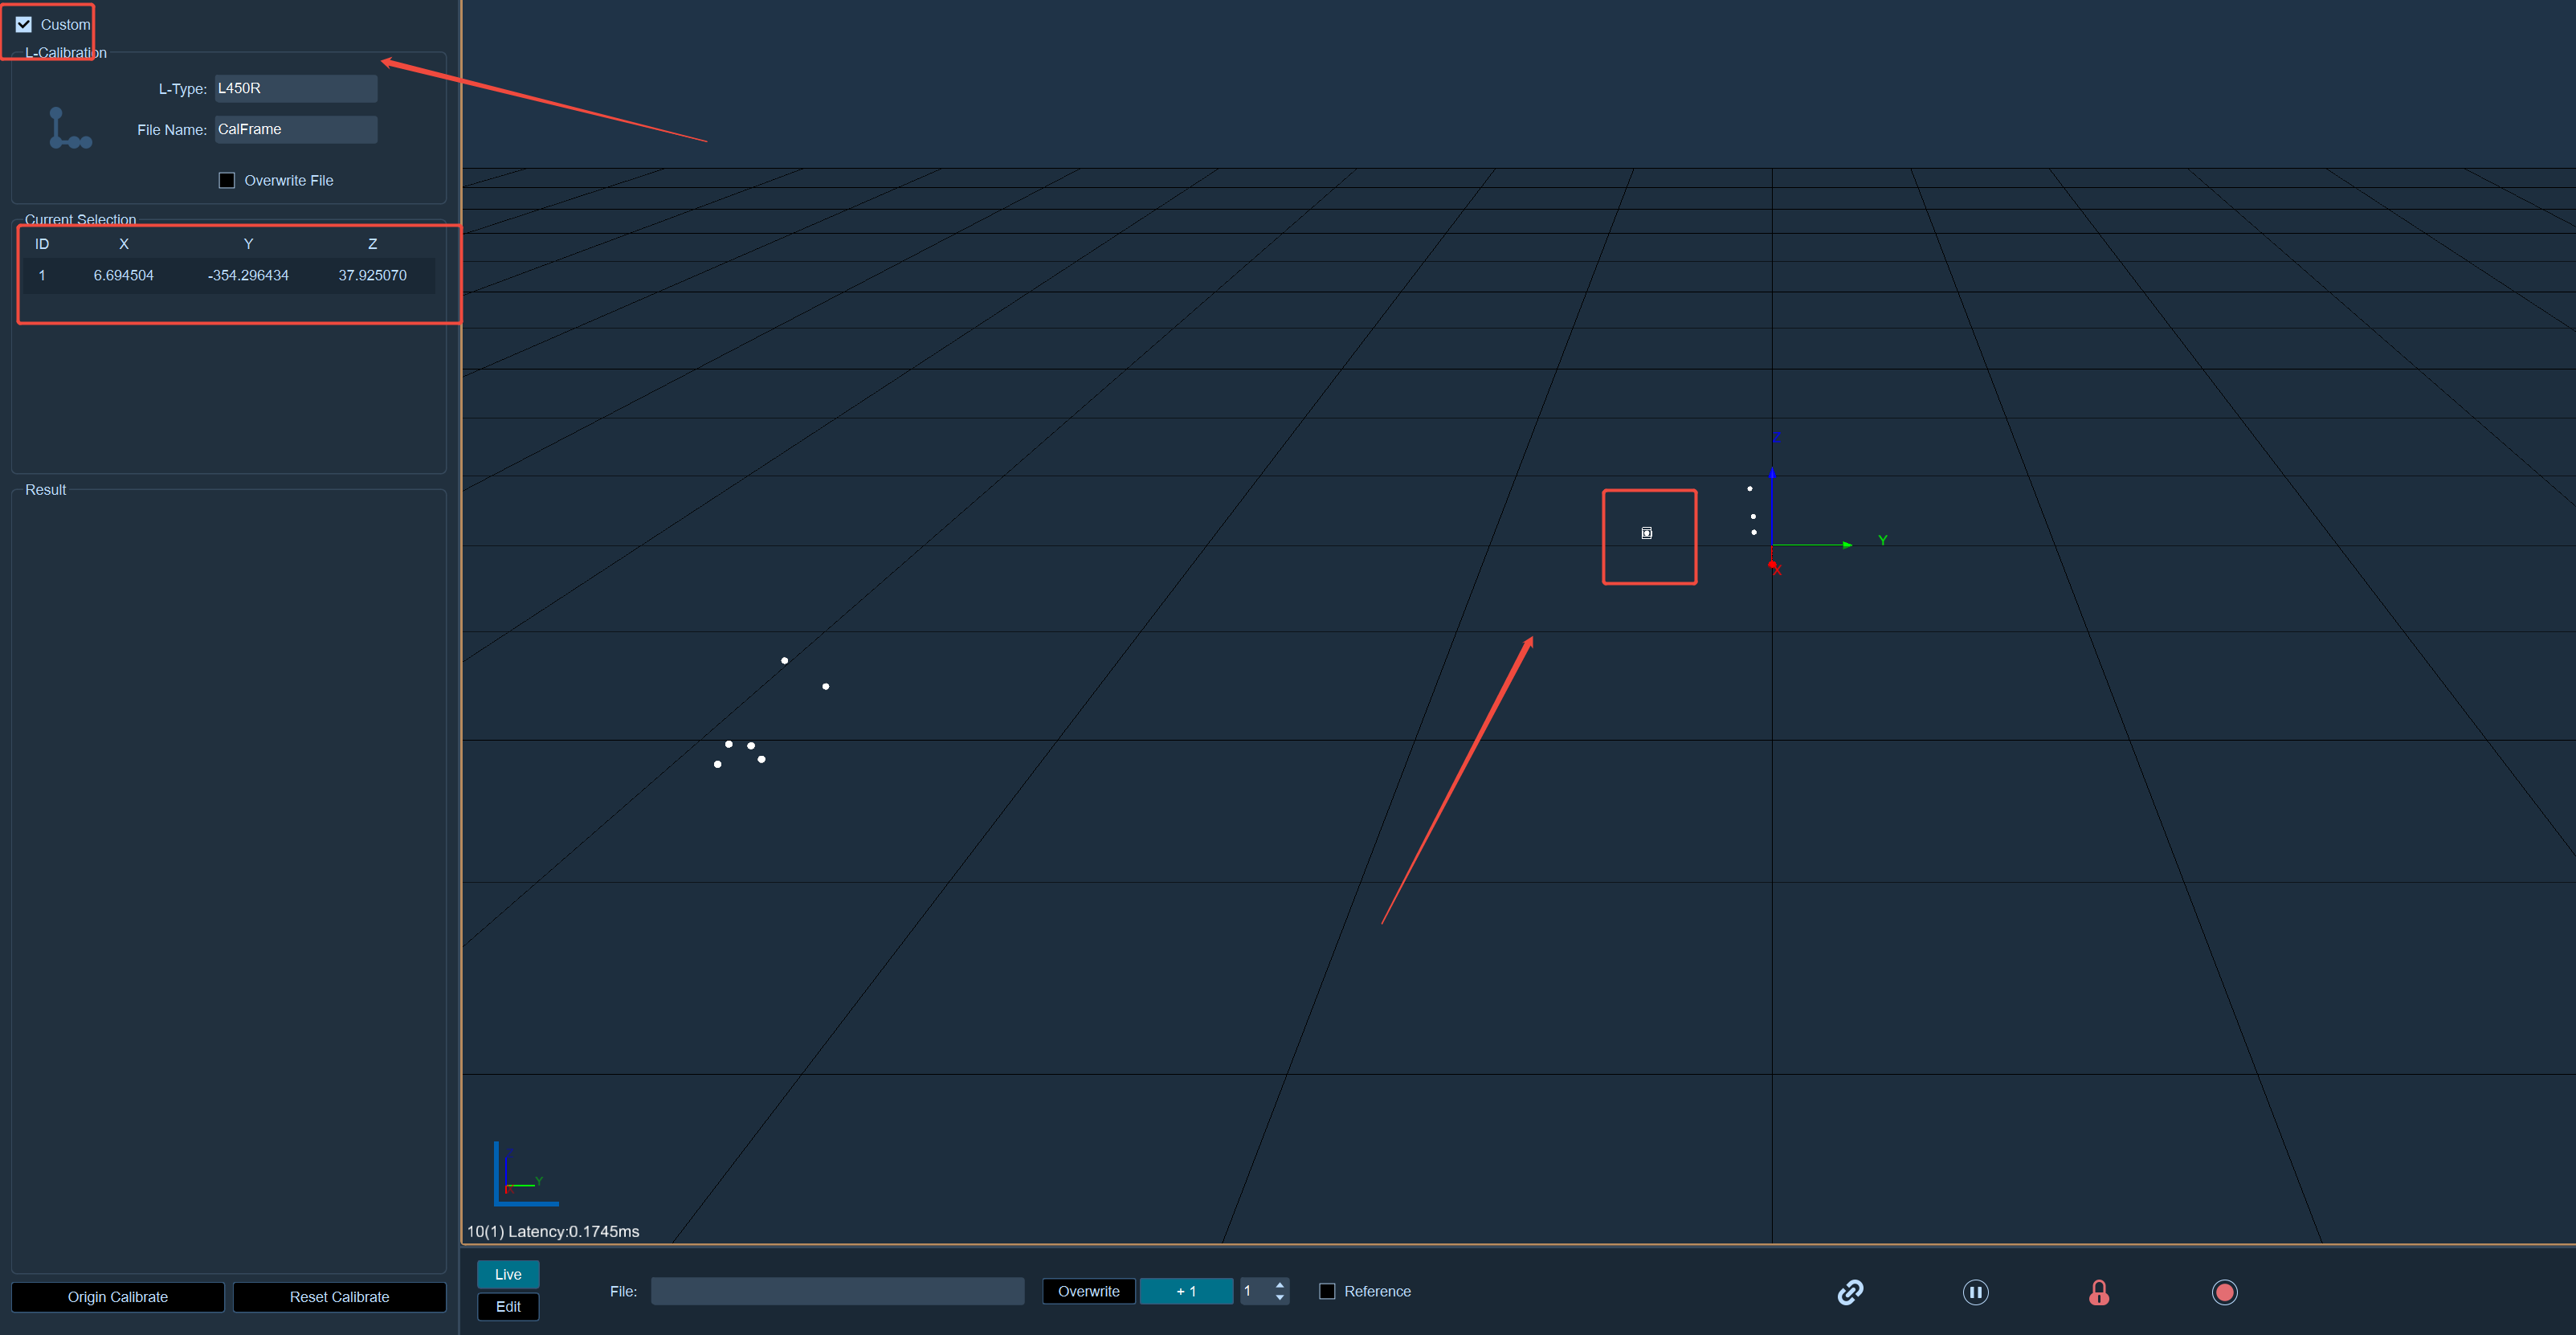
- Enable custom origin calibration. The software will freeze the current frame, and the 3D interface will display the frozen state.
- Select points to determine the coordinate axes and the origin:
- Select the first point: In the 3D view, pick a point, and the software will freeze this point and recognize it as the origin. At this time, the calibration panel will display the XYZ position information of this point.
- Select the second point: Continue to select another point in the 3D view. This point will be used to determine the long axis direction. Similarly, the calibration panel will update and display the XYZ position of the newly selected point.
- Select the third point: Choose another point. This point is used to determine the short axis direction. Each time a point is selected, the calibration panel will display its XYZ coordinates in real time.
- After selecting points in the 3D view, click the L calibration.
warning
The operation method for multiple selection points in the custom origin calibration is as follows: When selecting the remaining points, you can hold down the CTRL key to perform multiple selection. This can improve the selection efficiency. If a total of four points are selected, the software will execute the origin calibration operation.
warning
Custom origin calibration requires the selection of points; otherwise, the calibration cannot be completed.
During the process of selecting the points, it is essential to ensure that the chosen points can accurately represent the required origin and the direction of the coordinate axes; otherwise, the calibration results may be inaccurate.