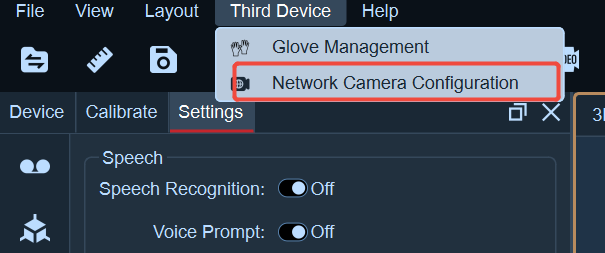
(Ⅵ)Camera connection
Network camera connection:
- Open the Astra software, click the "Third-Party Devices" menu bar at the top of the software, and select "Network Camera Configuration".
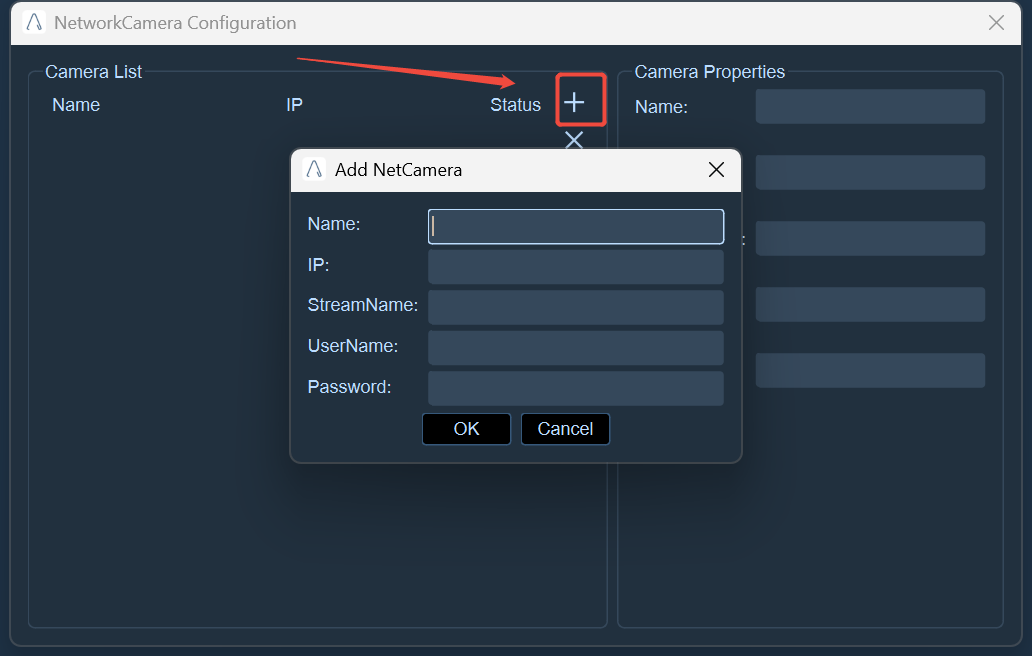
- In the network camera configuration window, click the "+" button, enter a custom name (you can use the camera's IP address as the name for easy differentiation), and input the camera's IP address (e.g., "10.1.1.201", which is located at the bottom of the camera) in the address field. For standard network cameras, there is no need to fill in the stream name, username, or password. However, if using special cameras (such as edge cameras), you need to fill in the stream name; the username and password are optional. After completing the information input, click "OK".
- The camera list will display the information of the currently added cameras. After selecting a camera name, the properties of that camera will be shown on the right side.
- Open the reference video to display the camera image. Next, click the "Connect" button. After detecting the number of lenses, click the "Play" button to start using the camera.
USB camera connection:
- USB cameras do not require configuration in the software. After completing the networking of USB cameras, simply open the software and start the reference video to display the images of each USB camera.
Device Connection
- After clicking the camera connection button at the bottom of the interface, a window will pop up prompting the number of detected cameras.
- If the pop-up window indicates that no camera is found, or the number of cameras is inconsistent with the actual situation, please check whether the camera is properly connected, whether the IP address on the computer side has been modified, whether the firewall and antivirus software are turned off, etc.; after completion, click the play button at the bottom of the interface to start the camera.