(Ⅲ)Software Installation
Astra software installation
- On a 64-bit Windows operating system, turn off the firewall and exit antivirus software (such as 360 Security, Tencent PC Manager, etc.). Right-click and select "Run as administrator" to launch "Astra.exe". The installation interface will pop up; simply click "Next" sequentially as prompted to proceed with the installation.

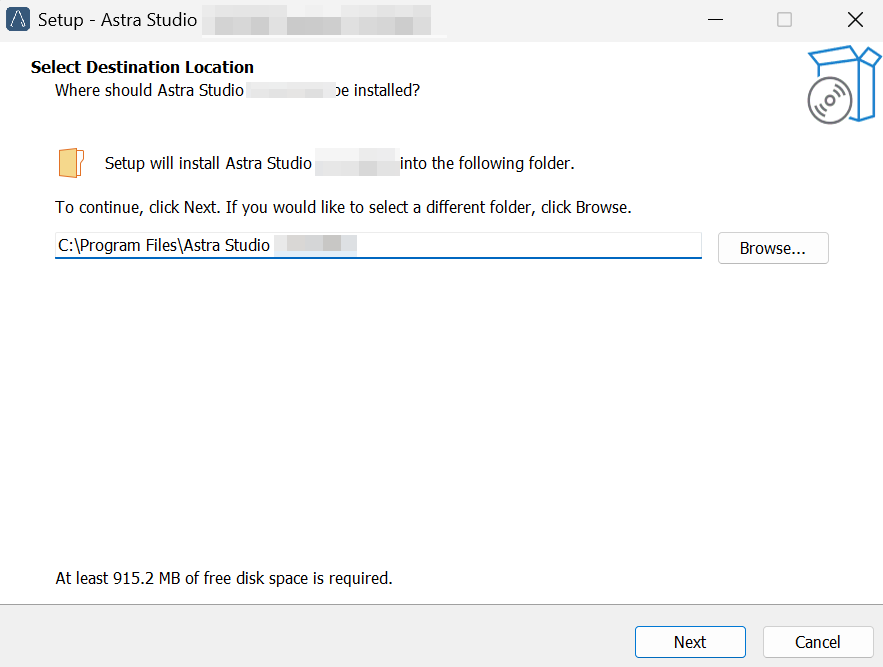
- After the installation is complete, the Astra software icon will appear on the desktop.
CUDA Download and Installation
-
CUDA Version Selection:
-
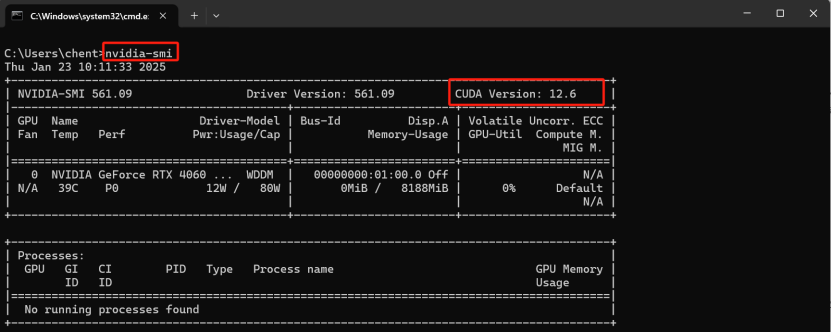
To check the CUDA version supported by your computer, press Win+R, type cmd to open the command prompt window, and enter the nvidia-smi command. The interface shown in Figure 1 will be displayed, indicating the highest CUDA version supported by your computer. This tutorial selects CUDA version 12.1 for installation.
-
-
CUDA Download:
-
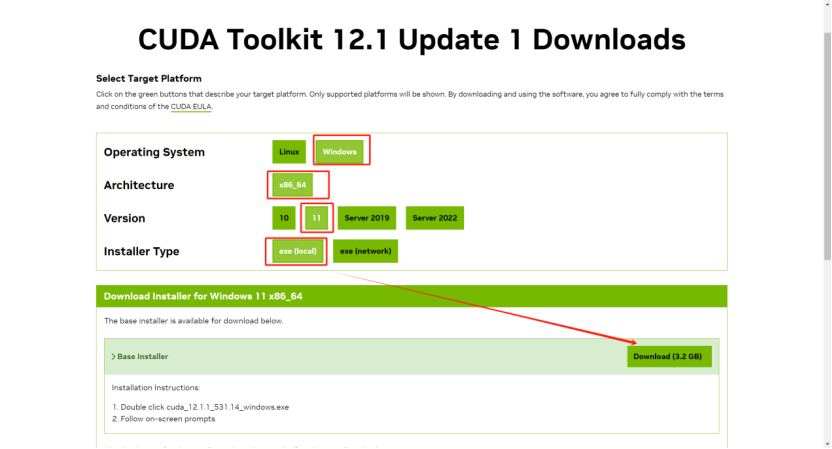
Click the official website download link: https://developer.nvidia.com/cuda-toolkit-archive. As shown in Figure 2, select the CUDA 12.1.1 version for download.

-
Follow the prompts to select the system version corresponding to your computer, as shown in the figure below.
-
-
CUDA Installation
-
Double-click the
.exefile in the downloaded installation package and select the installation path. It is recommended to use the default path. -
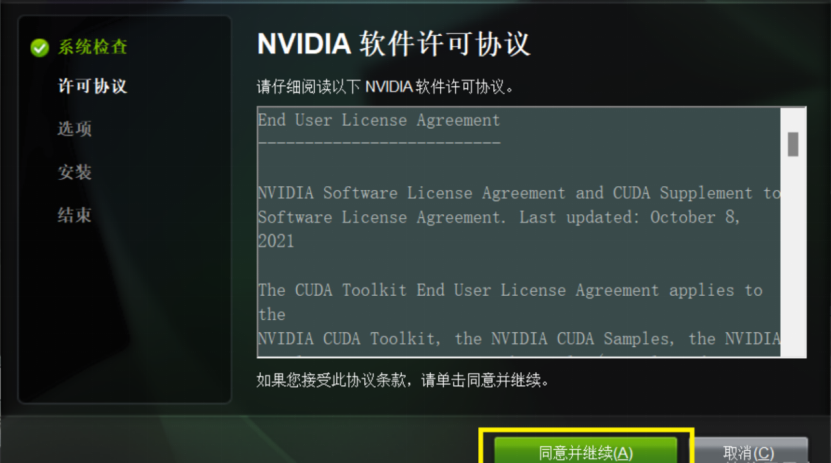
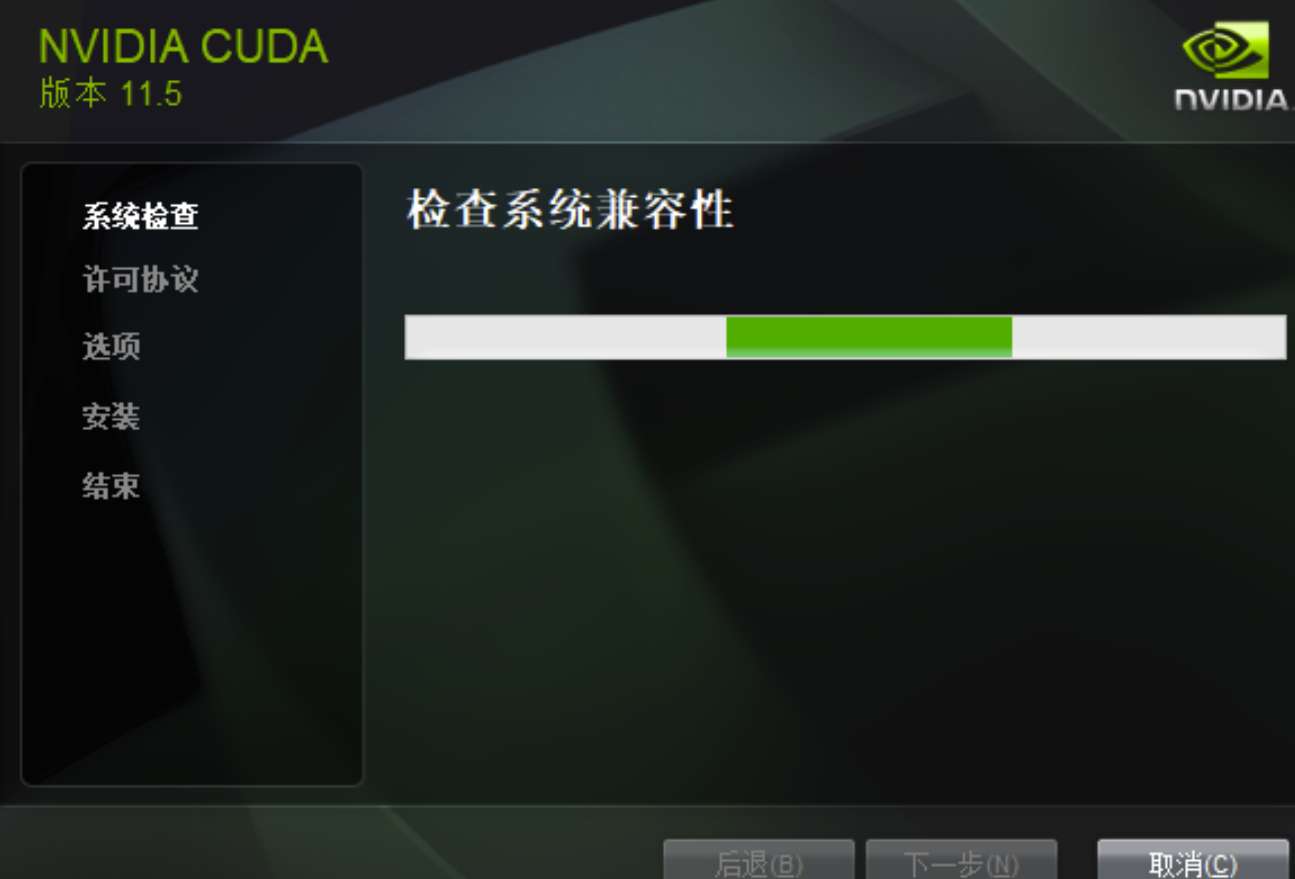
System Check: Select "I Agree and Continue" as shown in the figure below.
-
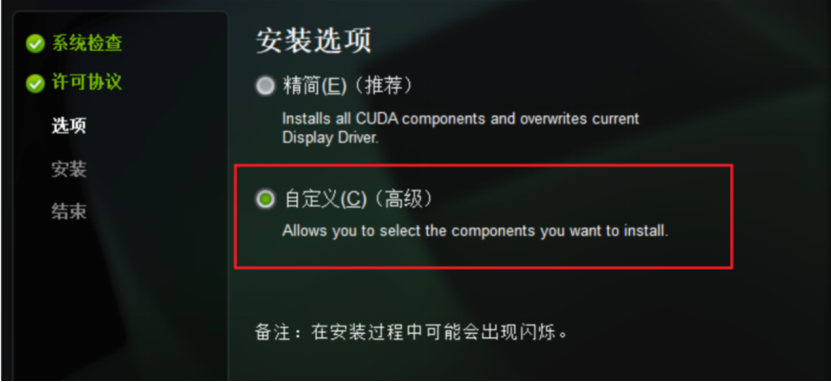
License Agreement: Select "Custom" and then click "Next," as shown in the figure below.
-
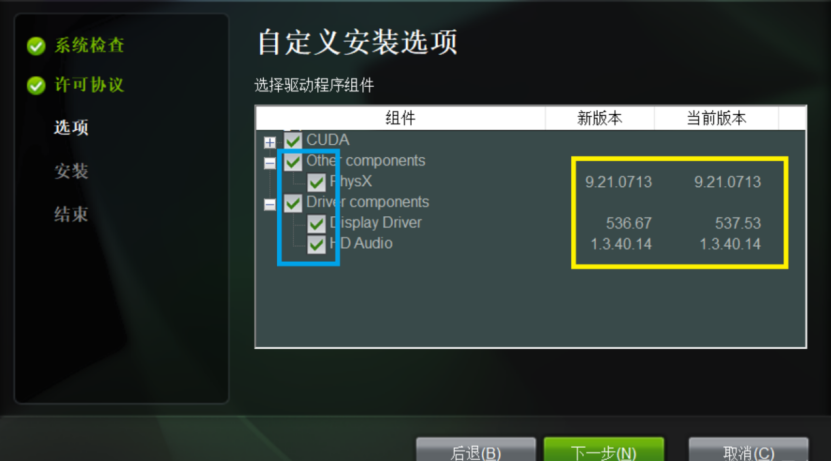
Options: CUDA is mandatory. If this is your first installation, check all options. If the new versions of Other components and Driver components are lower than the current versions, do not check them, as shown in the figure below.
-
Select the installation path: It is recommended to use the default path, which will be required later. Finally, click Next.
-
-
Adding CUDA Environment Variables
-
Environment variables are generally added automatically. For safety, you can check them by going to Settings -> Advanced System Settings -> Environment Variables -> System Variables, as shown in Figure 7. Note: You need to restart your computer after configuring the environment variables.

-
-
Verify if CUDA is Installed Successfully
-
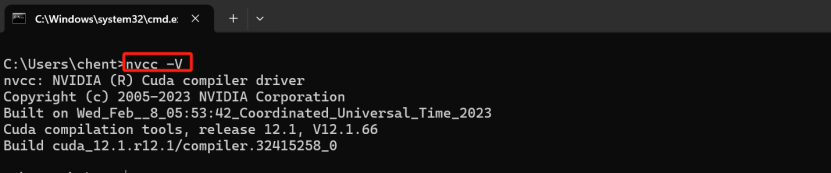
Press Win+R, type cmd to enter the command prompt window, and input the command nvcc -V. If information as shown in the figure below appears, it indicates that CUDA is installed successfully; otherwise, the installation has failed.
-
Download and Installation of cuDNN
-
cuDNN Download
-
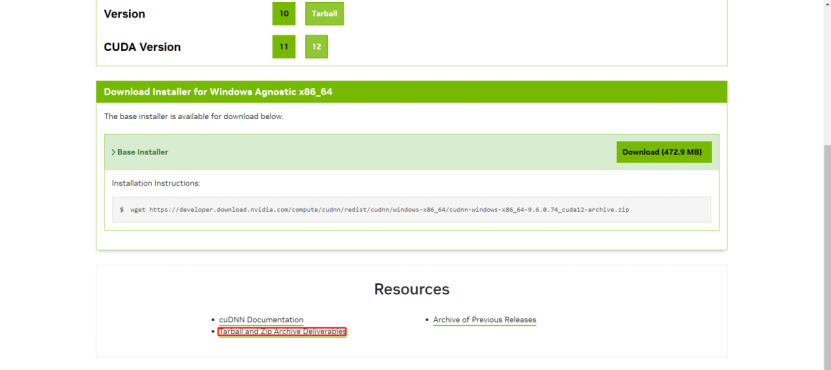
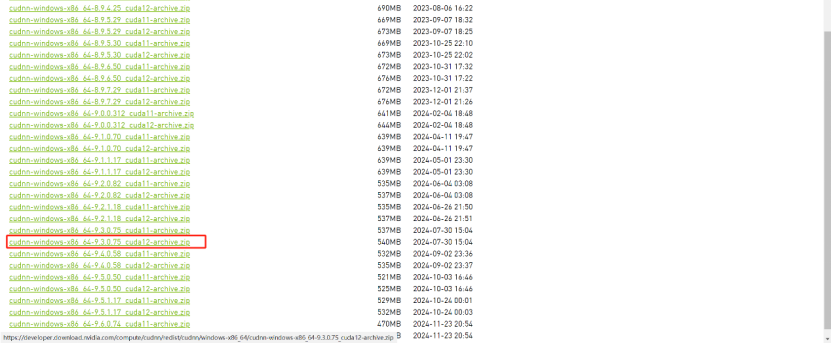
First, click the official website download link: https://developer.nvidia.com/cudnn-downloads?target_os=Windows&target_arch=x86_64&target_version=Agnostic&cuda_version=12. Select the option in the red box at the bottom shown in Figure 3.3.9. After entering, click "cudnn", then select the Windows version. After that, choose the corresponding cuDNN according to the CUDA version and download it, as shown in Figure 3.3.10.
-
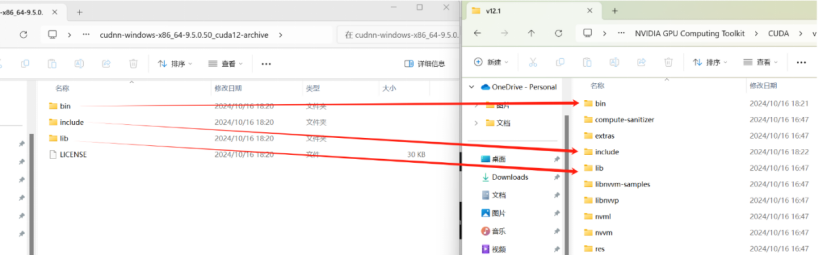
After downloading and unzipping, locate the previously installed CUDA path (if forgotten, open cmd and enter which nvcc to output the CUDA installation path). Then copy all contents of the three files in the cuDNN folder to the corresponding CUDA directory, as shown in the figure below.
-
-
Environmental Variable Control
-
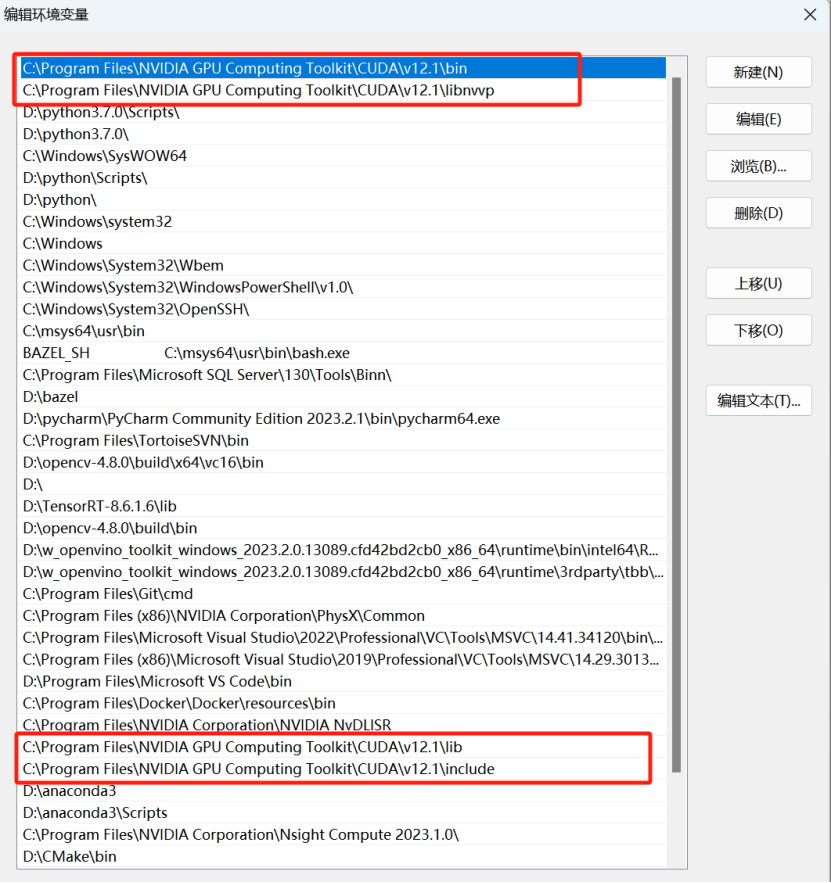
Open the system variables, edit the Path variable, and ensure that the four environment variables in the figure below are present. If any are missing, add the corresponding ones.
-
-
Verify whether the installation was successful:
-
Press Win+R -> type cmd -> enter the command
cd C:\Program Files\NVIDIA GPU Computing Toolkit\CUDA\v12.1\extras\demo_suite. -
Enter the command
bandwidthTest.exe, and the prompt information shown in the figure below will be displayed.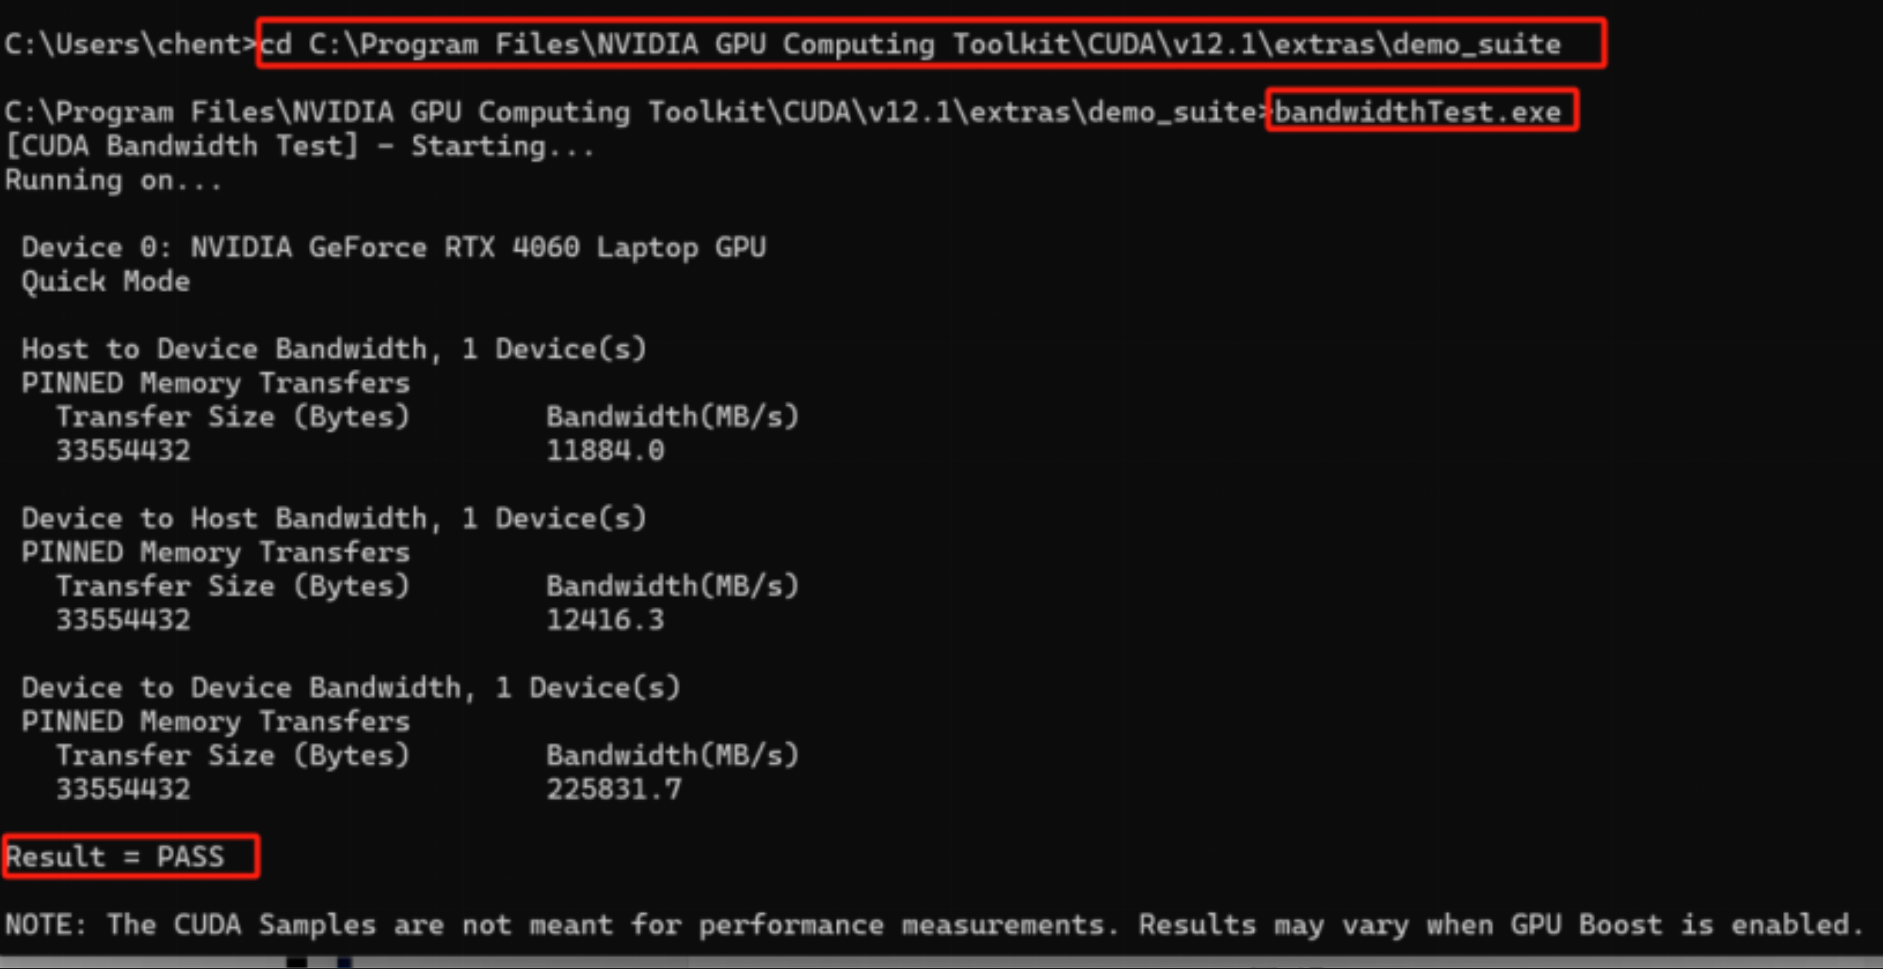
-
Enter the command
deviceQuery.exe, and the prompt information shown in the figure below will be obtained.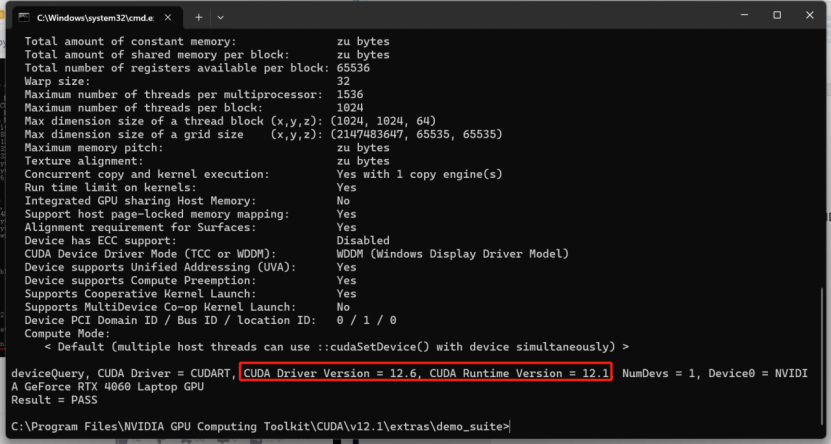
-
So far, the installation of CUDA and cuDNN is complete.
Note: The computer needs to be restarted after configuring the environment variables.
-
Solutions for Failed CUDA Installation
-
An error occurred during the CUDA installation process:
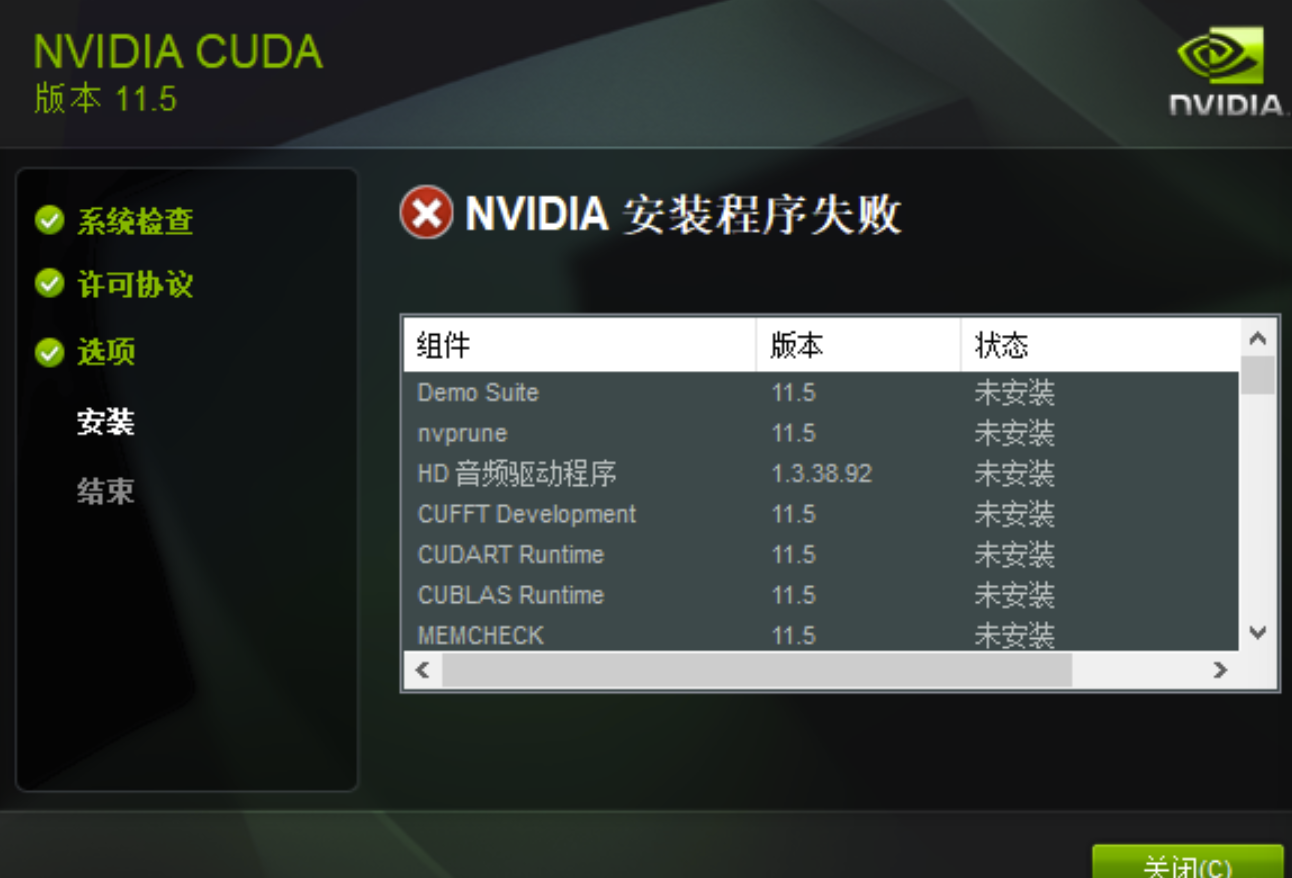
-
Solution: After downloading the CUDA version, double-click it directly and select the default installation path.
-
Click Agree and Continue.
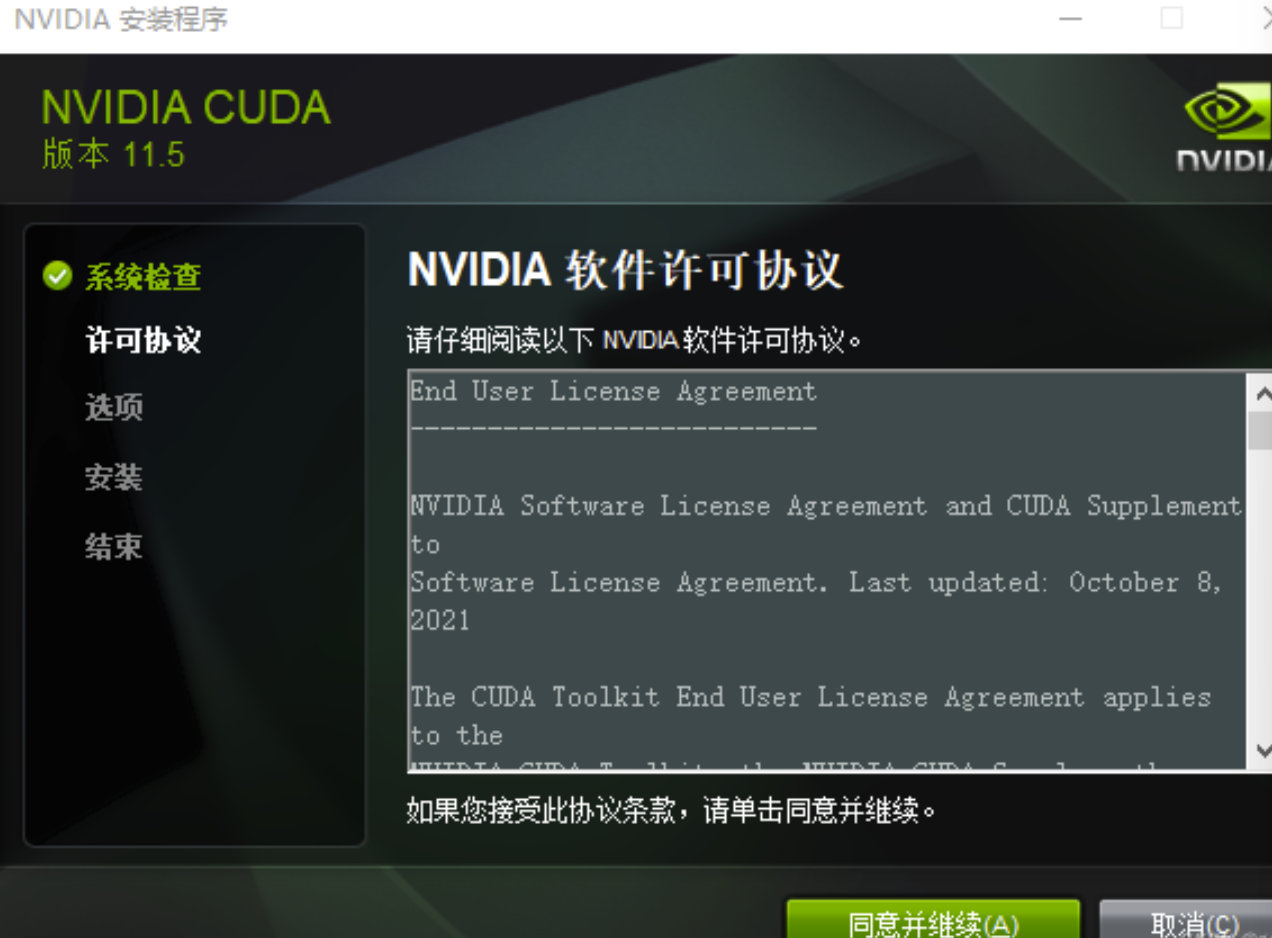
-
Select the custom mode.

-
When selecting components, uncheck Nsight VSE and Visual Studio Integration in CUDA, then click Next to complete the installation successfully.
