(4) Origin calibration
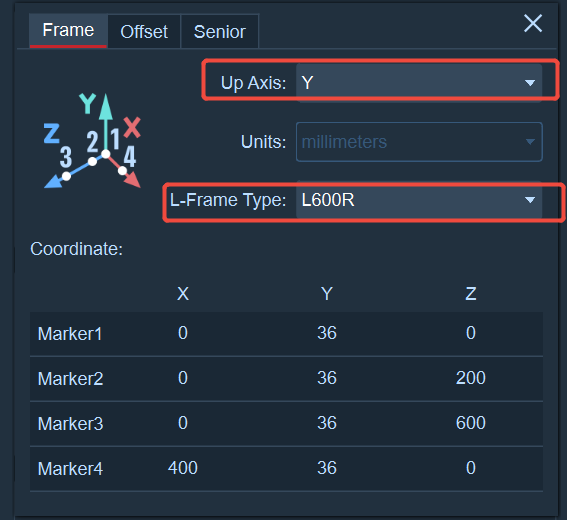
- After calibration is completed, the coordinate origin will be displayed in the 3D view. If you need to update the origin position, please open the calibration panel, click the gear button, and set the calibration axis to the Y-axis. Open the reference video calibration panel, set the calibration type to "Origin Calibration", select the correct L-shaped calibration rod type, and click the Start Calibration button.
-
Place the L-shaped rod in the field. When the Y-axis is upward, the long axis of the L-shaped rod is the Z-axis, and the short side is the X-axis.
-
Click on the freeze frame and, following the instructions in the "Calibration Record", click on the Marker points on the L-shaped rod in sequence on each reference video view.
.png)
- After completion, click "Add Frame". After the calibration is finished, switch to the 3D view. The origin position has been updated.
info
Notes:
- Please click in the order indicated in the calibration record, sequentially clicking on the Marker points at positions "1, 2, 3, 4".
- If you cannot see the Marker points of the L-shaped rod clearly, you can use the middle button of the mouse to zoom in or out of the image in the reference video to click on the Marker points.
- When clicking on the Marker points, try not to click in the wrong position or in a crooked manner. Click on the exact center of the Marker points in the image.