The software supports the independent connection of data gloves. For the supported data glove brands and their usage methods, please read "XVI. Third - Party Device Connection - Inertial Gloves".
According to the brand of the data gloves you connect, please read "XVI. Third - Party Device Connection - Inertial Gloves - Glove Management" to add and configure the gloves;
After the glove addition and configuration are completed, place markers on the gloves of both hands. Avoid having the markers on the two pairs of gloves be identical or similar.
After putting on two pairs of gloves, straighten your hands and arms in a T-Pose, click the freeze frame, select the markers on one of the gloves, right - click on the 3D view, and select "Create Human Body".
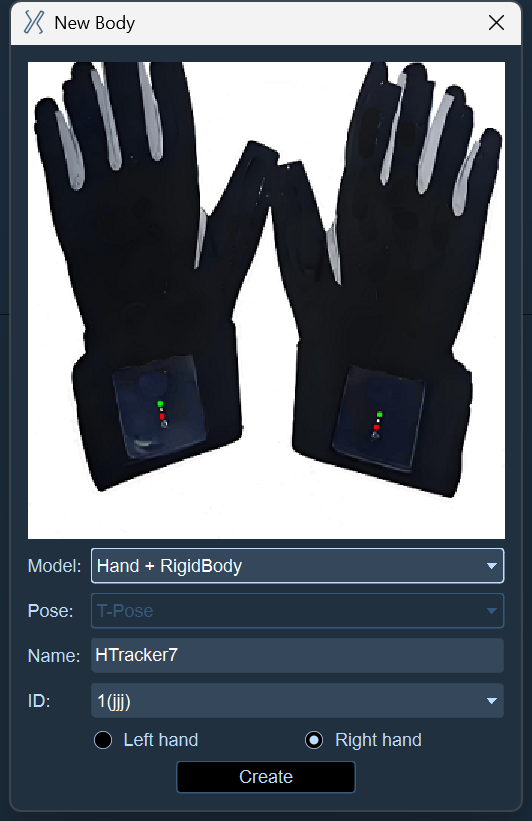
Expand the model dropdown list in the Create Human Body window and select the "Hand + RigidBody" model.
Enter a name or keep the default name
Select the glove number
Select the left hand or the right hand, make the choice according to the actual situation
Click the Create button
The model of one hand has been successfully created. Next, create the model of the other hand.
Create the model of the other hand according to the above steps, un-freeze the frames, and you can see that the models of both hands are driven by the data gloves.
The data gloves can also be bound to the specified rigid body for use. Prepare a Rigid board with unnamed points pasted on it.
After freezing the frame, select the unnamed points on the Rigid board by dragging a box, right - click and select "Create Human Body", choose the "Hand + RigidBody" model, enter the model name, select the glove number, choose left or right hand according to the worn glove, and click "Create".
The model is successfully created and will be displayed on the Rigid board. At this time, the operator can wear gloves and move, and the model's skeletal joints in the 3D view will also be driven by the data gloves.
After creating the Hand + RigidBody model, we can set its initial offset and rotation.
Click on the freeze frame, select the root bone of the model (RightHand or LeftHand), open the axis tool, and select "Translation" or "Rotation" to set the offset and rotation of the model.
.png)
.png)